Microsoft Excel is packed with hidden tools that can transform your workflow, yet many users never discover them.
Today, I'm unveiling five secret Excel tools that will enhance your productivity and make your tasks easier.
By the end of this blog post, you'll wonder how you ever managed without them. My favorite is number four - let me know your favorite in the comments below!
Table of Contents
Hidden Excel Tools Video

Hidden Excel Tools Practice File
Enter your email address below to download the sample workbook.
1. Quick Analysis Tool
If you've ever faced a new dataset and felt overwhelmed, the Quick Analysis Tool is here to help. This tool provides a range of shortcuts to help you make sense of your data quickly and efficiently.
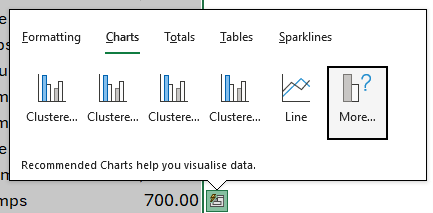
Quick Analysis - Charts
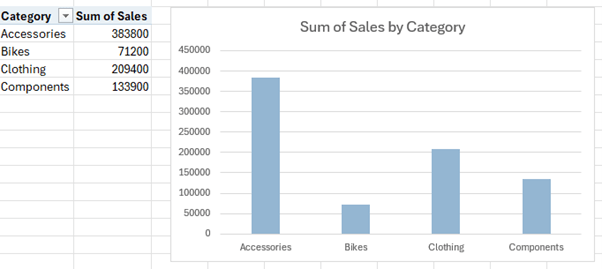
Imagine you have a table of sales data categorized by year, category, and product.
Simply press CTRL+Q, and you'll see a variety of tools at your fingertips. For example, the Charts tab allows you to visualize sales by category instantly.
Excel will insert a PivotTable and chart summarizing your data, which you can further customize.
Quick Analysis - Conditional Formatting
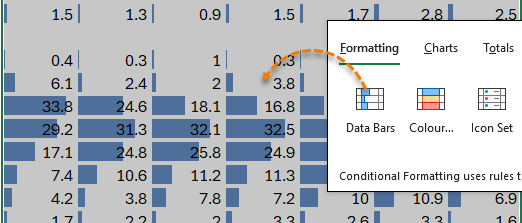
Conditional formatting can transform a sea of numbers into a visually comprehensible format.
For instance, if you have data on the daily intake of fruits and vegetables, pressing CTRL+Q and selecting Formatting > Data Bars will help you see how different age groups are performing at a glance.
Quick Analysis - Totals
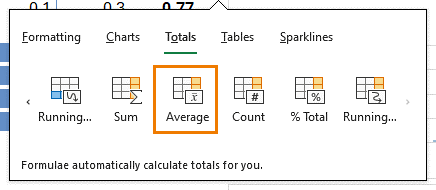
You can quickly calculate the average or other totals using the Quick Analysis Tool.
Highlight your data, press CTRL+Q, and select Totals > Average.
Excel will insert the AVERAGE formula for you, saving you time and effort.
Quick Analysis - Sparklines
Sparklines are another powerful feature available through the Quick Analysis Tool.
Insert a column next to your data, select the data range, and press CTRL+Q. Choose Sparklines to visualize trends in your data, such as the consumption of fruits and vegetables across different age groups.
2. Flash Fill
Flash Fill is a lifesaver for cleaning messy data with a simple keyboard shortcut.
Example 1 - Split First & Last Names
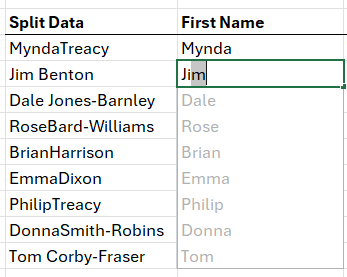
If you have a list of names that you want to separate into first and last names, enter an example for the first row and press CTRL+E to trigger Flash Fill. Excel will automatically fill in the rest.
If you encounter hyphenated names, provide another example, and Flash Fill will adapt.
Example 2 - Email Addresses
Flash Fill can also construct email addresses from first and last names. Type an example like [email protected], press CTRL+E, and let Flash Fill do the rest.
This tool recognizes patterns and applies them across your data set. Download the practice file for more examples to try.
3. Drag to Fill
Copying and pasting formulas can be time-consuming, but 'drag to fill' offers a more efficient method.
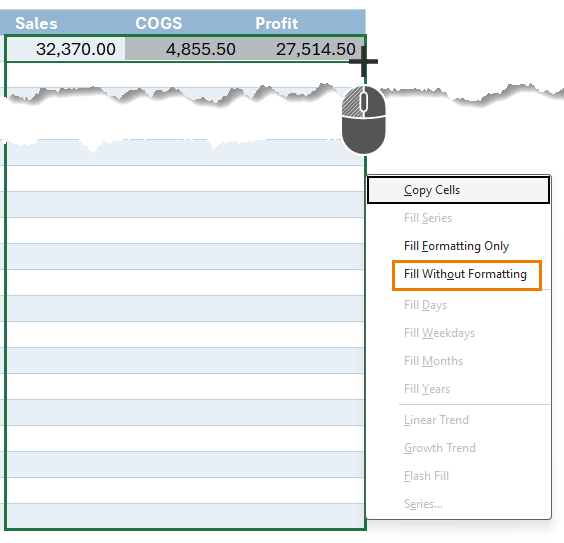
Instead of using the traditional copy and paste, right-click and drag your formula to fill the cells without altering the formatting.
It might feel unusual at first, but you'll quickly get used to it.
4. Custom Filter
Custom Filter is perfect for managing large datasets, allowing you to find exactly what you need quickly.
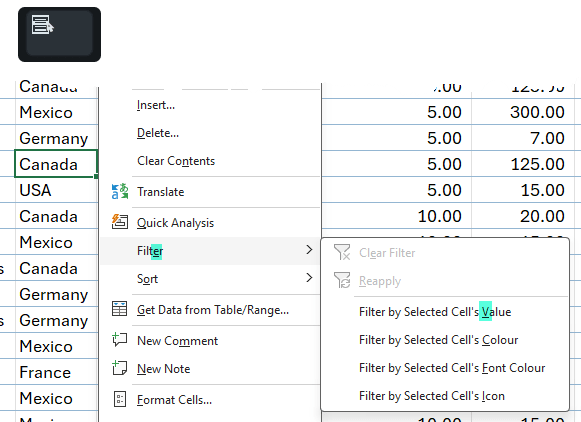
For example, to focus on specific data, select a cell with the value you want to filter on, in the screenshot below I've selected 'Canada', press the Menu key, and use the shortcut E for Filter and V for Value.
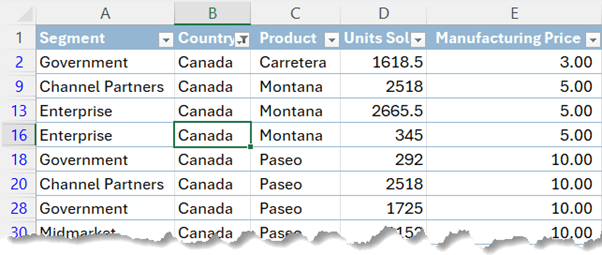
Your table will now display only the Canada data and filter buttons have been added to each column.
You can apply additional filters by repeating these steps, making it easier to handle extensive datasets.
5. Navigation Pane
Navigating a workbook with numerous sheets, tables, and charts can be daunting.
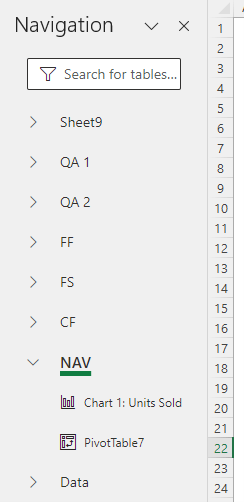
The Navigation Pane offers an instant overview of your workbook, allowing you to find and access different elements swiftly.
Accessing the Navigation Pane
Go to the View tab and select Navigation Pane.
This will open a sidebar showing a list of all sheets in your workbook.
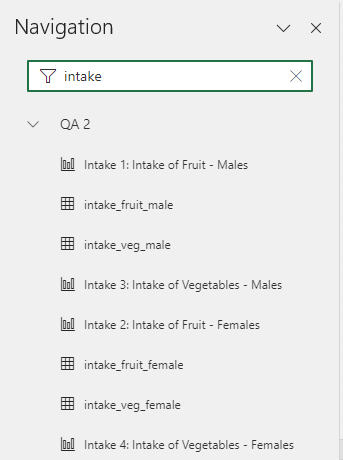
You can click on a sheet to jump to it and see a list of its elements. The search bar at the top allows you to filter for specific items, making navigation effortless.
Next Steps
Excel's hidden tools are powerful features that can significantly boost your productivity.
If you want to explore these tools further and master Excel, consider enrolling in my Excel Expert Course.
This course offers tutorials from beginner to advanced levels, hands-on practice, and a Certificate of Completion to enhance your resume.
Click here to start your journey to becoming an Excel pro today.
For more Excel tips, check out my Top 10 Excel Productivity Tips for Work. You'll discover quick and easy ways to solve common Excel problems. See you there!





High, thanks for the Tipps. How can I open the NavPane on the left. It always opens on the right side of my screen, your screenshots seem to open left sided.
thanks
Klaus
You can left click the top of the pane and drag it out. To pin it to the other side, quickly drag and release it where you want to pin it.
Unfortunately, the Navigation Pane cannot be activated 🙁
Many Excel users claim it all over the Internet.
Hi Michael,
It’s only available in 365. What version of Excel do you have?
Mynda