Excel Formula Writing Tips, Tricks and Tools that will change how you work in Excel
Formulas are THE MOST IMPORTANT EXCEL SKILL you can master, but when you start nesting functions, things can quickly get out of hand. In this lesson I’m going to cover some little known Excel formula writing tips, tricks and tools that’ll give you ninja level skills and enable you to decipher any formula. Even ones you haven’t written yourself.
Watch the Video

Download the Quick Reference Guide & Cheatsheet
Enter your email address below to download the free files.

Formula References
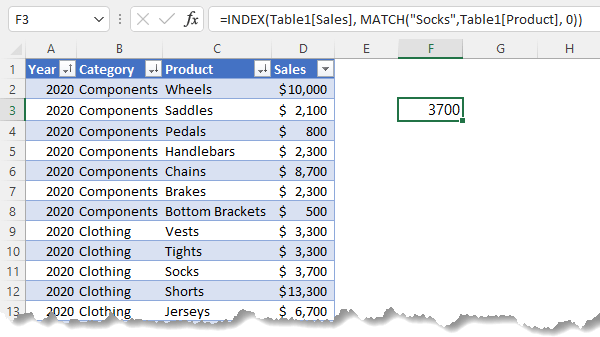
The first thing we can do to make formulas easy to write and later read is to format our source data in an Excel Table with the keyboard shortcut CTRL+T. This way we can use the Table’s structured references in our formulas.
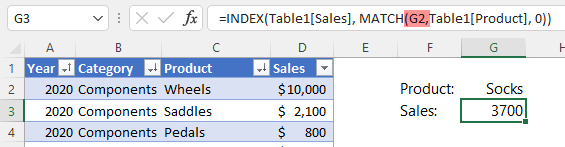
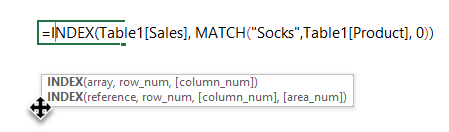
In the example below you can see the formula references the table name and column names, making the formula much clearer to read without having to refer back to the cells themselves:
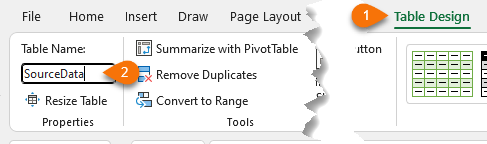
Bonus tip: Tables are given a default name when they’re created, in the example above it’s Table1. You can rename the table with something more useful via the Table Design Tab, then enter a new name in the Table Name field:
Comparing the Table’s structured references to regular cell references and you can see it’s a no brainer:
=INDEX(D2:D76, MATCH("Socks", C2:C76, 0))
Another benefit of using Excel Tables is the Structured References automatically include any new data added to the table, so there’s no need to edit formulas to pick up new cells.
Automatic updating and structured references are just a couple of the benefits of using Tables, see them all in my Excel Tables course.
Alternatively, if your data isn’t in an Excel Table, you can define names and use those in your formulas instead. If your data range is likely to grow, then you should use dynamic named ranges that automatically adjust.
Formula Structuring
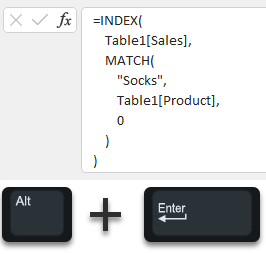
When you start nesting functions inside one another it’s a good idea to wrap the individual components onto separate lines so that it’s easy to read. It’s easy to do in the formula bar by entering a line break with ALT+ENTER:
Alternatively, if you have Excel 2013 or later you can use the Advanced Formula Environment. Simply paste the unformatted formula in, and it will format it for you (see video for steps):
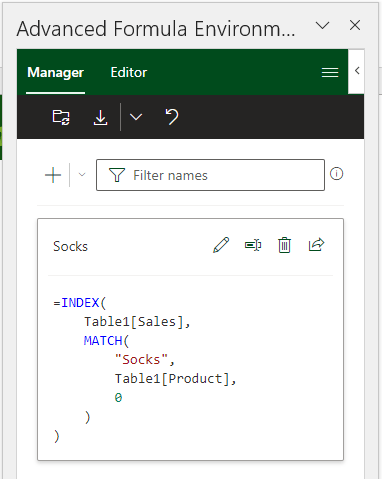
And the nice thing about using the Advanced Formula Environment is the colour coding that makes it easier to read the formula. Simply copy the formula out of the Advanced Formula Environment and paste it over the top of the original formula in the formula bar* or define the formula as a name by saving it in the Advanced Formula Environment.
*Note: it will not retain the colour coding shown in the Advanced Formula Environment if you copy and paste it into the formula bar.
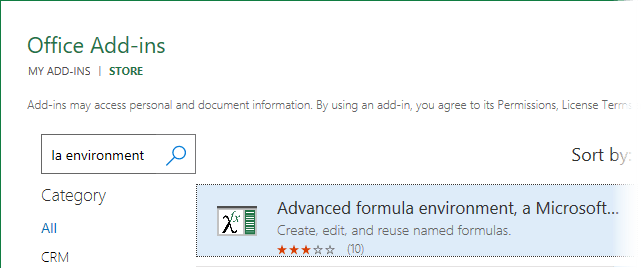
You can download the Advanced Formula Environment via the Insert tab > Get Add-ins:

Then search for ‘Advanced Formula Environment’:
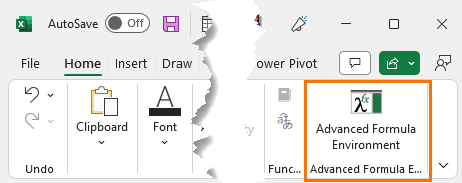
Once installed it will be available on the Home tab of the ribbon:
Formula Constants
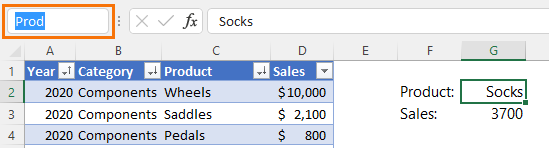
Try to avoid hard keyed values in formulas like in the previous examples where the lookup value, “Socks”, was hard keyed. Instead, place the value in a cell. You can then reference this cell from multiple formulas and should you need to update it, simply edit that one cell and it will update all formulas:
Even better is to give that cell a name by typing it in the name box:
And use that in your formulas:
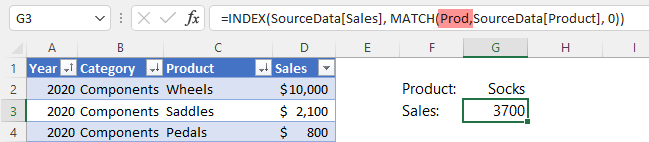
Alternatively, you could define the constant in a name:
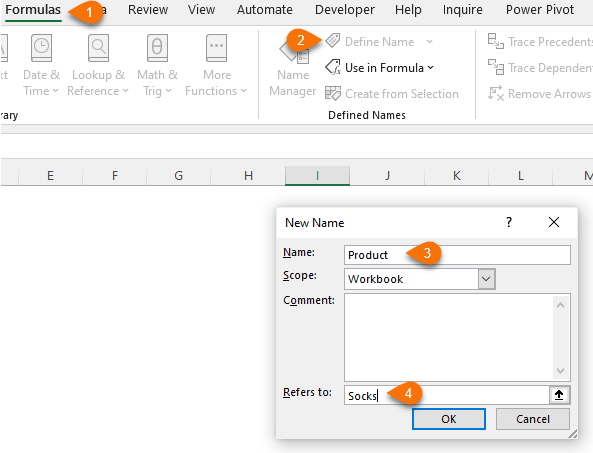
And use the name in the formula:
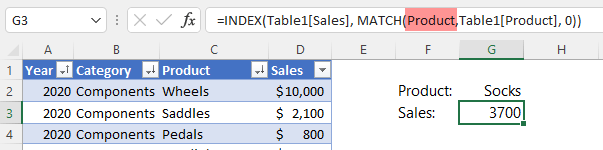
You can then edit the defined name to change it, and it will update all formulas that reference that name.
Formula Navigating
If you’ve ever experienced Excel not letting you enter a formula because you’re missing a closing parenthesis, but you just can’t see where it should go, then you’ll find these formula navigating tips helpful for identifying where each component of the formula starts and ends.
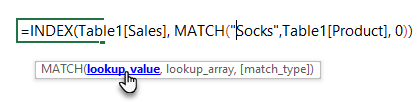
When you’re in edit mode inside a formula, the function tooltip will display however, often this can be in the way. Hover your mouse over the edge of the tooltip until the 4-headed arrow appears, then left-click and drag it out of the way.
Navigate to each argument using the function hyperlinks in the tooltip:
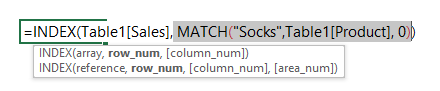
The bold argument in the tooltip indicates the current location of the cursor or selected component of the formula:

After the last argument you should have a closing bracket/parenthesis. We can see one here for the MATCH function’s match_type argument:

And another here for INDEX’s row_num argument:
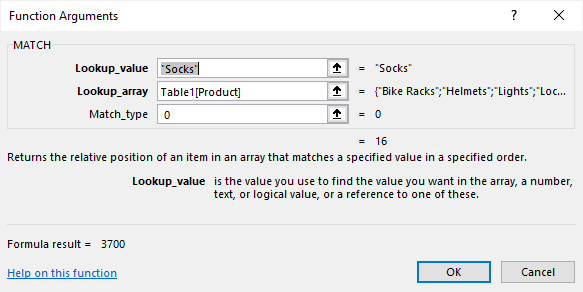
If you can’t remember how a function works, click on the function icon to the left of the formula bar to open the function wizard:
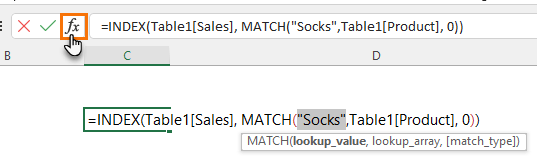
The function wizard dialog box contains more information about the function and each argument:
Formula Evaluating with F9
You may have managed to get Excel to accept your formula, but perhaps it’s not returning the correct result. Here we have a couple of tools that will help identify where the problem is.
First, we can use the F9 key to evaluate parts of the formula then press F9:
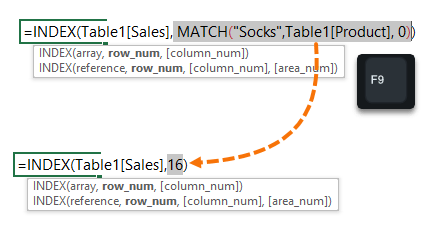
It will display the result of the selected element. Continue selecting elements and evaluating with F9. Press CTRL+Z to undo the last element evaluated, or Escape to return the formula to its prior, unevaluated state.
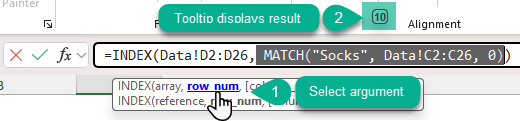
[UPDATE] Microsoft 365 users now have an automatic tooltip display above the selected argument without the need to press the F9 key. Simply select the argument or whole formula to trigger the tooltip - see screenshot below:
Formula Evaluating with the Evaluate Formula Tool
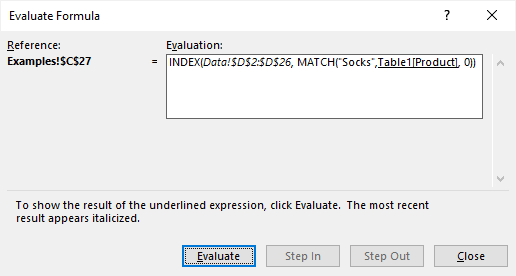
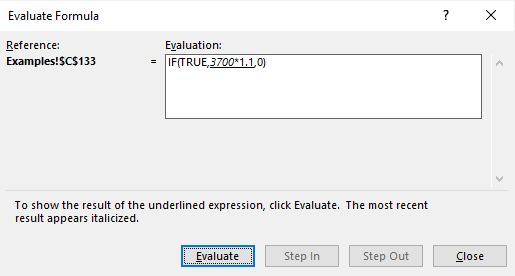
Sometimes you have many nested functions and elements and it’s difficult to tell what order Excel is evaluating in. This is when the Evaluate Formula tool is handy. It takes you step by step through the formula in order of evaluation displaying the results one component at a time:
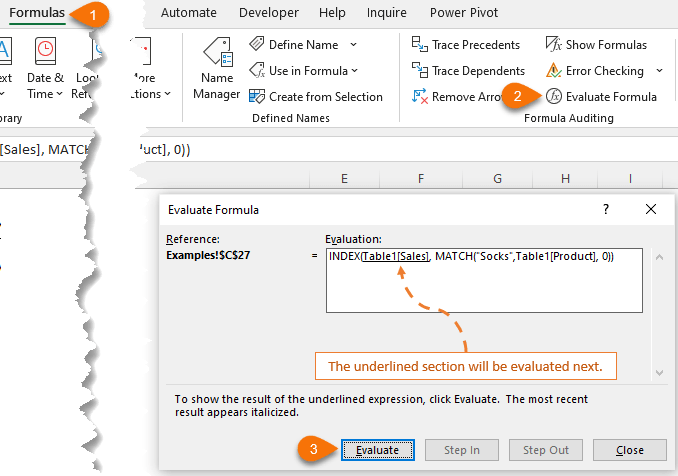
Pressing ‘Evaluate’ displays the cell range and moves the underline to the next element to be evaluated:
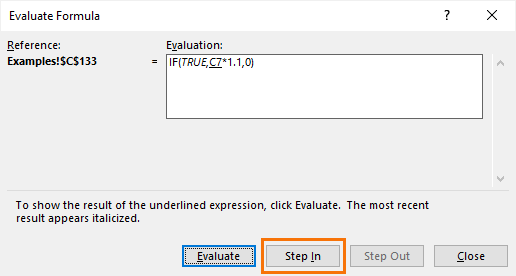
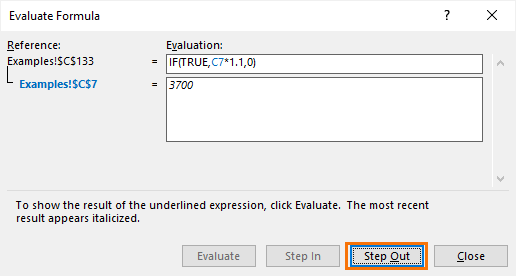
If the formula references the result of another formula, you can step in and step out of the referenced formulas. In the example below, cell C7 contains a formula:
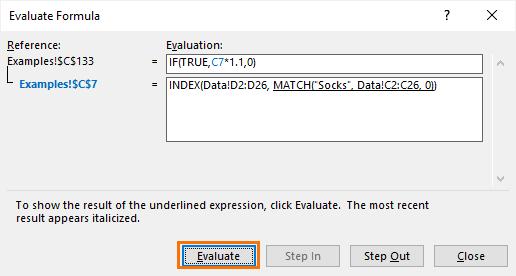
Stepping in shows the formula and I can then start evaluating it:
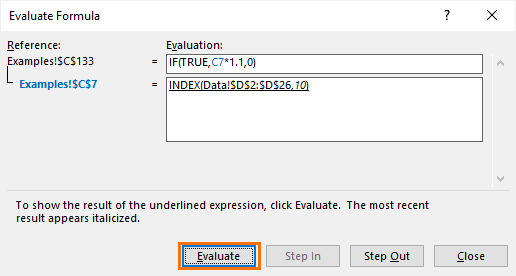
The limitation of the Evaluate Formula dialog box is that you cannot make it any bigger and often it’s too small to display the entire formula results, which means lots of scrolling making it difficult to use.

Thank You,
Great delivery of information
Glad it was helpful, Deborah!
I thought I was pretty good at using Excel until I found this wonderful woman back in 2018-19ish. Even though I’ve been out of ‘real’ work for a couple years while taking care of my parents, I’ve saved every email and enjoy finding these hidden treasures through Mynda. Thank you so much for sharing your knowledge and love of this extraordinary software!
— Tracy Linville
Thanks for your support and kind words, Tracy! So glad you enjoy our tutorials.
Great Video.
The AFE comes up on my Formula bar, not sure why, and it doesn’t matter, but I guess that is an update (perhaps because Microsoft is pushing the AI tool Analze Data on the Home page now.
It’s an update, Robert 🙂
Thank you so much for sharing your knowledge. I’m a retired accountant but still in love with Excel. That’s what I do as a hobby. I admire your generosity, its help me a lot.
That’s wonderful to hear, Michel!