The Advanced Formula Environment (AFE) is part of the Excel Labs add-in and is still in its early stages of development, but it’s already very useful, particularly if you’re scared to write your own LAMBDA functions, it can write them for you, as you’ll see!
You may have seen me use it a few times in tutorials lately, but recently it has undergone an update with some notable improvements, so I’m going to cover it in more detail in this tutorial.
You can get the free Excel Labs add-in from the Office store or via the Insert tab > Get Add-ins, and it’s compatible with Excel 2019 for Desktop onward, as well as Excel for Web and Mac. Once installed, it’ll be available on the Home tab of the ribbon on the far right:
It opens in a task pane, which you can detach and resize. Select the Advanced Formula Environment from the list.
Note: as this tool is still in development, the features and interface you see in this tutorial may be different by the time you come to use it.
Watch the Video
At the time of recording the video below, Excel Labs was called the Advanced Formula Environment. While the name has changed to Excel Labs, the functionality shown in the video is still the same.

Download Workbook
Enter your email address below to download the sample workbook.
Excel Labs Advanced Formula Environment Features
The Advanced Formula Environment is split into three main sections: Grid, Names and Modules.
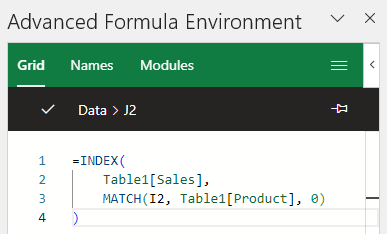
Grid: the grid tab enables you to enter formulas in cells, much like typing a formula in the formula bar, except it automatically wraps the formula onto separate rows for each component and applies colour coding.
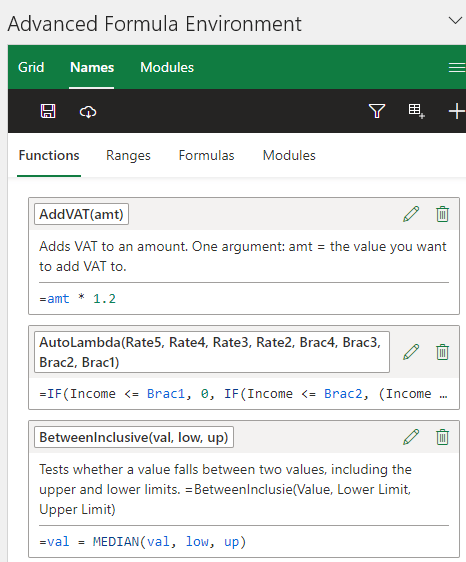
Names: The names tab is similar to the Name Manager for defined names. The first section contains Functions you write yourself i.e. LAMBDAs:
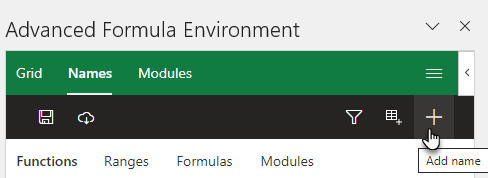
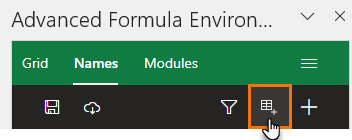
You can also author new LAMBDAs from here by clicking the + symbol shown below:
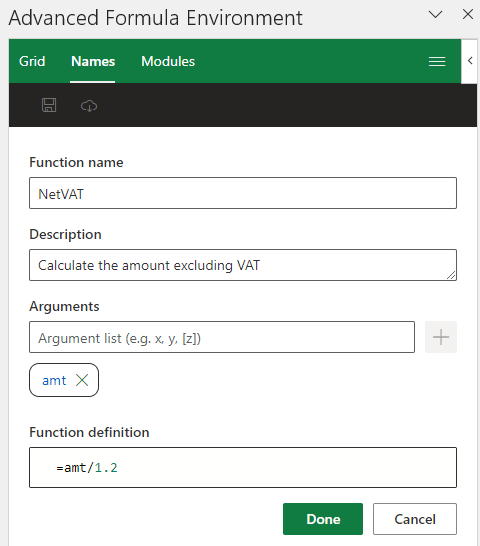
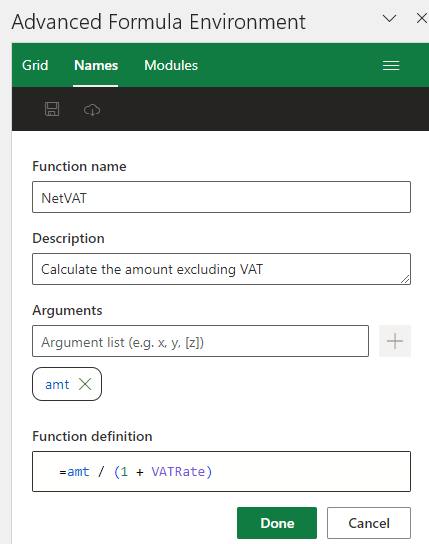
Then enter the formula. Note: here you do not need to wrap the formula in LAMBDA, simply enter your formula in the Function Definition field and click Done:
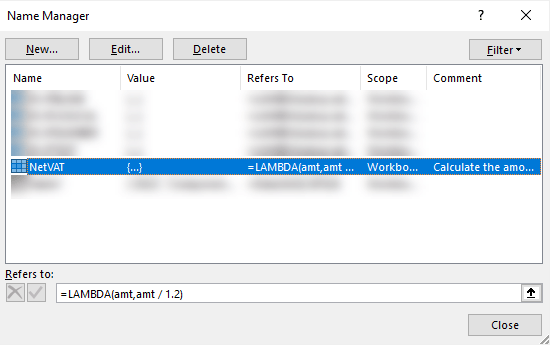
When you view the formula in the Name Manager, you’ll see it has written the LAMBDA for you:
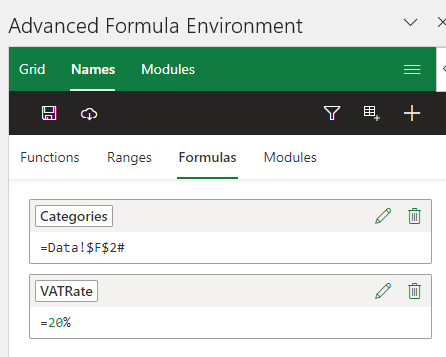
You can also reference named constants in the Advanced Formula Environment. These appear in the Names section under Formulas and are available in the IntelliSense. For example, I have a defined name for the VAT rate called VATRate, and I can reference this in my NetVAT formula:
This way should the VAT rate ever change, I only need to edit the defined name VATRate and it will feed through to any functions and formulas using it.
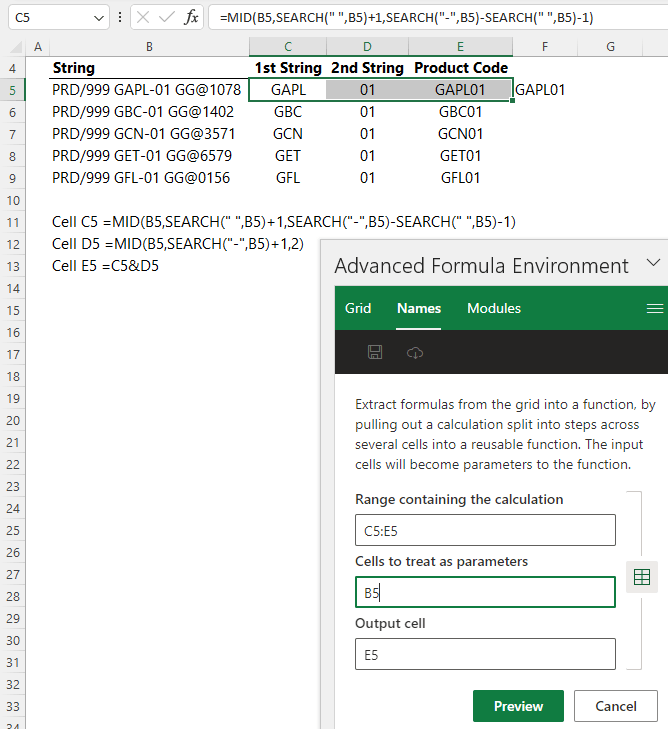
Another option is to generate LAMBDAs from formulas in the grid. You can convert calculations split into steps across several cells into a single LAMBDA. Select the cell containing the final result and then click the icon second from the end:
Then enter the range (these are the cells containing the intermediate formulas), the parameters (these are the other cells being referenced by the formula), and the output cell (this is the cell containing the formula):
Tip: if the range containing the formulas isn’t contiguous, you can enter the cell references separated by a comma.
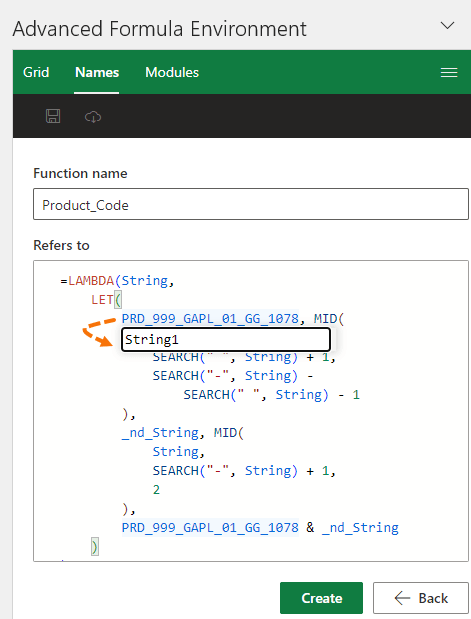
Click Preview to see the LAMBDA Excel has written for you (image below). It makes some assumptions about the parameter names, which you can change here.
Tip: select one instance of the name and press F2 to rename all instances:
Before clicking Create, you can rename the Function if you wish.
It should save automatically and be available in the name manager and grid, but if it doesn’t appear, you can click Save again. This will save it in the Name Manager and you can now use the function in the grid.
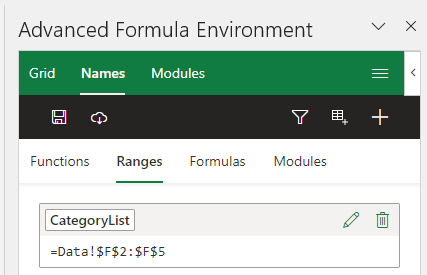
Ranges: The ranges area lists any named ranges in the file, however it currently doesn’t include Tables and it cannot display defined names that reference dynamic arrays.
Formulas: The formulas tab contains formulas you write and define with a name:
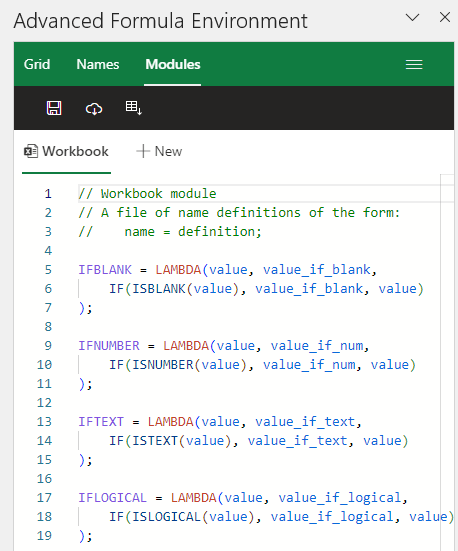
Modules: The Modules tab is used to store collections of named formulas defined using Gist code files from GitHub (cloud icon) or imported from the grid (spreadsheet icon).
You can try it out with the Gist file available at this URL: https://gist.github.com/jack-williams/5859d170fcb363dad1620c4d40770527
They can be added to the Workbook module (see image above), or you can create a new module (see image below).
Both are available within the workbook and appear in function auto-complete. Functions in the Workbook module appear in the intellisense list as is, whereas functions added to a new module are prefixed by the function name, separated by a dot operator
Formula Portability
Formulas saved in the Advanced Formula Environment are also in the Name Manager of the file. If you share the file with someone else, then they will have access to those functions in the file, just the same as any other defined names.

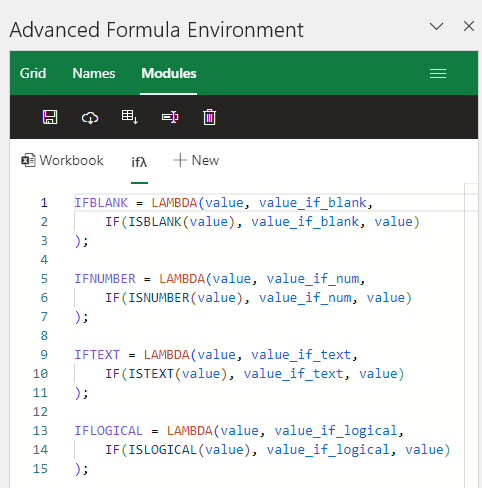
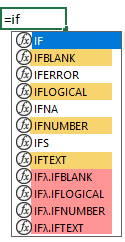


module name IF lambda symbol <– How do I type the lambda symbol from the keyboard here?
Not sure what you mean exactly. Have you tried pasting the lambda symbol?
Very Nice “Excel 2023”!
Some Proofing & Update Remarks:
1. “the parameters (these are the OTHER cells being referenced by the formula),”
I was a bit confused, at first, so I suggest adding the word: “other”.
2. “whereas functions added to a new module are prefixed by the function name, separated by a dot operator”
It is not “function name” – It is “module name” (prefix).
3. “The AFE will eventually support full formula localisation, …”
GitHub’s Project Page implies it already has full support (by omission of limitations):
“AFE supports formula localisation, …”
Thanks Oz.
1. done
2. they are custom functions, not modules.
3. maybe this has been updated since I wrote this post.
Hi Mynda – your instructions for accessing the Advanced Formula Environment is via the Home tab on the ribbon – in my case it is via the Formula tab !!!!
Ok. Might be a regional variation, or a recent update.