Ever felt held back with Word documents that just look too plain, almost like they're stuck in the past?
You might have put hours of work into writing the text that goes into your document, but no one wants to read them because they look boring and tedious.
But it doesn't have to be that way because Word gives you the power to dramatically enhance your documents, turning them from drab to fab in minutes with just a few clicks.
In this tutorial I'm going to share the Word Formatting tips and shortcuts to rapidly transform boring documents into captivating content quickly and efficiently.
Table of Contents
Watch the Video

Download Example Document
Enter your email address below to download the example Word document.

Font Formatting Shortcuts
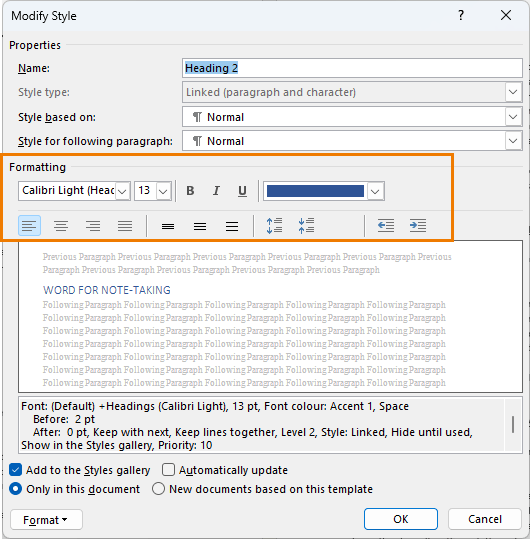
To ensure my documents can be updated quickly, I like to use the styles on the Home tab. Then I can quickly change formatting for all text that uses a style by right clicking > Modify:

In the dialog box, I can change the formatting for all text that uses that style in the current document:
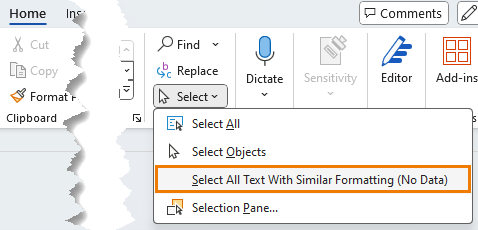
Selecting Similar Text
If I haven't formatted my text with a Style, I can still select text with similar formatting and change the format for all selected text in one go. Place your cursor in one example of the text you want to transform, then use the Select tool on the Home tab of the ribbon:
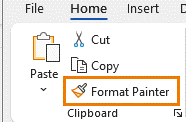
Copying Formatting
Another way I like to quickly apply formatting is by copying it from text that's already formatted the way I want using the Format Painter on the Home tab of the ribbon:
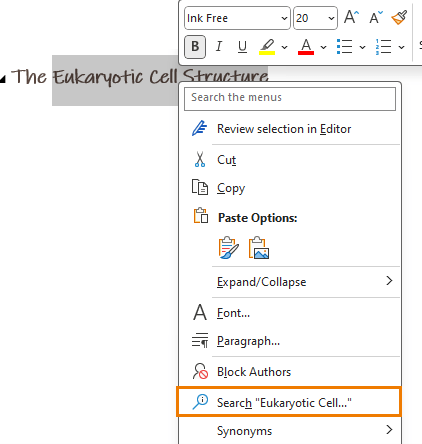
Tip: Double click the Format Painter to paste the format multiple times. Press Escape to exit format painter mode.
Smart Lookup
UPDATE: Unfortunately, in Microsoft Word 365, the right-click "Search" feature documented below - previously known as "Smart Lookup", has been retired as of January 1, 2025. Its removal is part of Microsoft's shift toward integrating AI-powered tools, such as Copilot, into the Office suite.
Right click words and phrases > Search to find images, definitions, web pages and more related to the selected text:
This opens the Search task pane with resources related to the selected text:
From here I can insert images, open web pages, related files and more.
Screen Clipping
Screenshots are easy to take without leaving Word. On the Insert tab > Screenshot:

Here I can insert screenshots of my current open windows or click 'Screen Clipping' and select the section of the screen you want to insert.
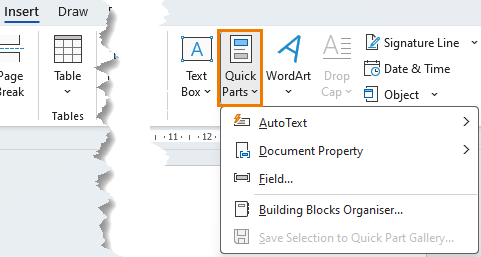
Quick Parts
On the Insert tab I can use Quick Parts to insert frequently used text snippets, like standard responses, product descriptions etc. I can also insert document properties like title and author, and fields for dates and formulas to name a few. Quick Parts are great for saving time and ensuring consistency across documents.
Section Breaks
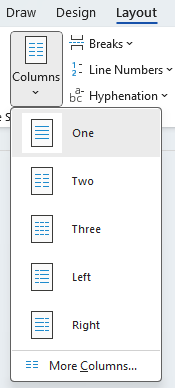
Occasionally I want one page of a portrait orientated document to be landscape. I can do it with section breaks. Likewise, if I want part of my document to have multiple columns.
Place the blinking cursor at the start of the section > Layout tab > Breaks > Continuous:
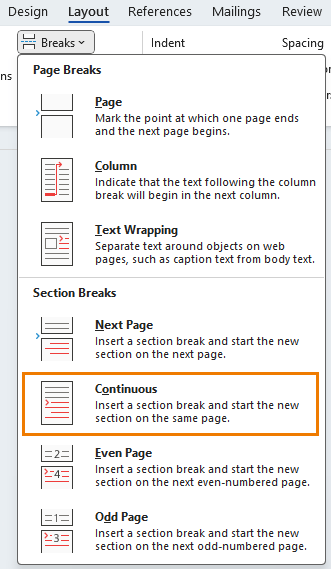
Repeat at the end of the section. Now I can choose my column layout for that section:
Note: if you want to change the layout for a whole page, then choose the Next Page section break.
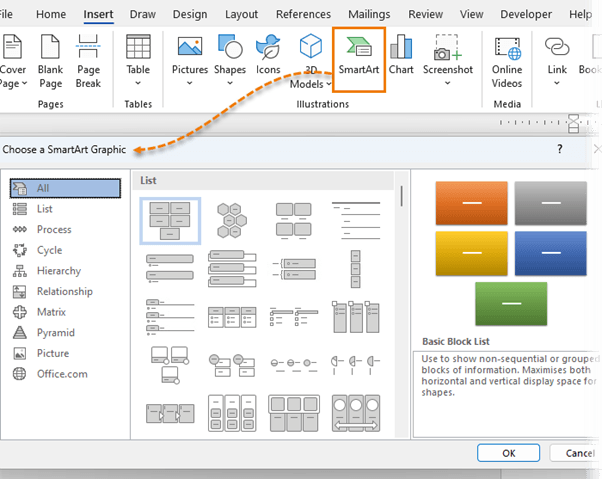
Smart Art Diagrams
Using diagrams not only ads more interest to my documents, but it also makes them much easier to consume and remember.
There are loads of predefined diagrams to choose from available on the Insert tab > Smart Art:
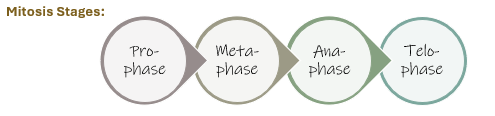
For example, instead of having the Mitosis Stages written as boring text, I used the Circle Process Smart Art to illustrate them diagrammatically:
Shapes
Shapes can be used to highlight sections of your document, to store text, or as decorative elements. I used them to add interest to my document header:

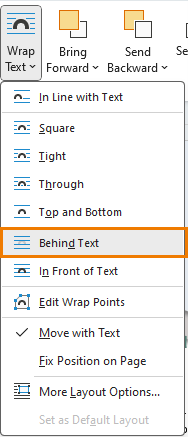
Tip: set the Layout to 'behind text' to enable positioning of the shape anywhere on the page:
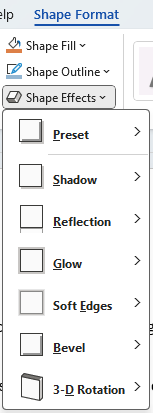
Add Shape Effects like shadows and more via the Shape Effects drop down on the Shape Format tab:
Tip 1: right-click a shape you want to insert multiple times to lock drawing mode:
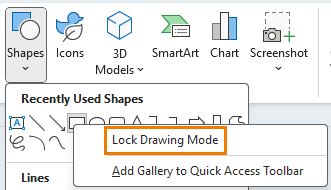
Press Escape to exit drawing mode when you've inserted all the shapes you need.
Tip 2: If I've spent time choosing the shape fill, outline, and effects, I like to set the default shape so that any future shapes I insert automatically inherit the same format. To set the default, right click on the shape > Set as Default Shape:
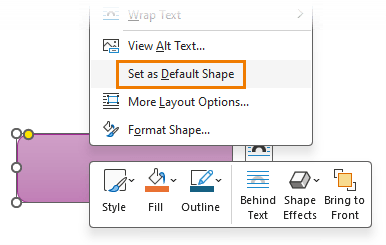
Note: this doesn't set the default shape as such, but rather the formatting that will be applied to any future shapes you insert in this document.
Stock Images, Icons and Illustrations
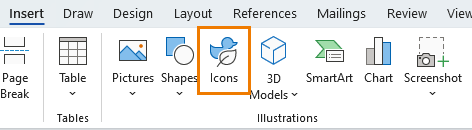
Microsoft 365 users also have access to a library of illustrations via the Icons button on the Insert tab:
From the Icons dialog box, you can choose from Images, Icons, Cutout People, Stickers, Illustrations and Cartoon People to bring your documents to life:
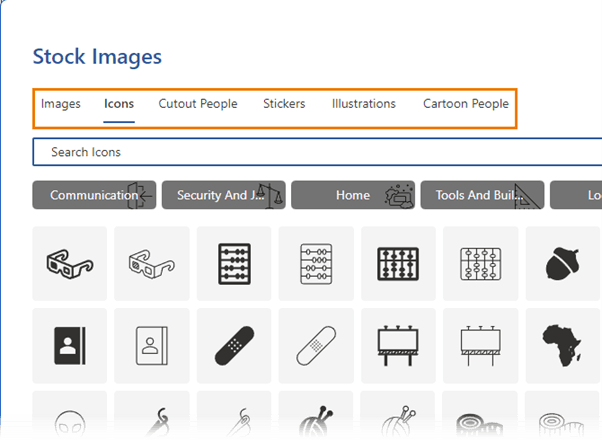
Note: The screenshot above shows the Icons gallery.
Next Steps
Whether you're just starting out or looking to refine your advanced skills, my 3-hour Microsoft Word Masterclass is set to transform your document skills. This course is designed to double your productivity and elevate the impact of your documents.
What you'll get:
- Halve your document creation time with expert shortcuts and efficiency tips.
- Turn your text into visually stunning layouts that captivate and communicate more effectively.
- Customize like a pro, ensuring every document perfectly aligns with your professional image.
Plus, you get exclusive access to our member support forum, downloadable resources for practice, a certificate of completion to add to your professional profile, and more.
Find out more and join my Microsoft Word Course here.

I understand you may not be in the US but we have a set of accessibility laws that are really pushing towards making all our documents meet these laws. Your document may be interesting but it is not completely accessible. I point this out just because accessibility is a conversation worth having. I took your document and ran the internal MS accessibility checker and it wasn’t the worst but it didn’t pass.
Good point, Sara. It’s important to know your audience and if in doubt, publish for accessibility. I cover the tools Word has for ensuring accessibility in my Word course.
I create job aids for my company and just saved myself so much time by watching your video. I did not know about using ctrl with the mouse to duplicate the shape – I’ve been doing it the slooooow way for years. I’m also forever in your debt for the tip to set the default formatting for shapes. Again, way too much time has been lost to recreating the shape each time. Thank you!!
So pleased you’ll find these tips useful, Sherri!
I’m grateful that we have the sample documents, but I wish you would include a “before” version so we can apply the lessons learned to it, rather than only seeing the finished product.
Hi Adam,
Generating the Before version is easy: highlight pages 1 and 2 of the finished document with your mouse. Ctrl+C to copy. Open a new Word document and Paste > Special then select ‘unformatted text’.
Mynda