Prompted by a couple of questions on our Excel forum I thought I'd write about how to record a macro in Excel, and show how simple it can be.
Excel contains a tool called the Macro Recorder, and what it does is to create VBA code for the actions you perform in Excel.
So you can use it to record the steps needed to perform boring and repetitive tasks, and then run the macro later to perform this task for you. By examining the code the macro recorder generates you can teach yourself about VBA too.
The Developer Tab
Before you can record a macro, you need to enable the Developer tab in your Ribbon.
Once that is done you have various tools and buttons available to work with macros.
Macro 1 : Center Across Selection
We have some text we want to center across the selected cells. To do this manually you have to:
- Select the cells to center across
- Right click on the cells and choose Format Cells
- Click on the Alignment tab
- Choose Center Across Selection from the Horizontal Text alignment drop-down list
- Click OK
Recording the Macro
Type some text into a cell, it doesn't matter what is is for the purposes of recording the macro. Then click on the Developer tab and click on Record Macro.
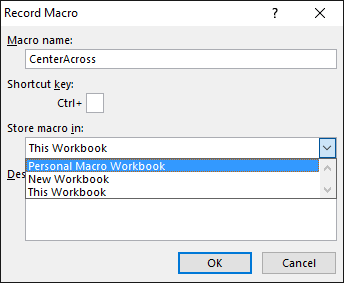
Excel will pop-up a window and ask you what you want to call the macro, so give it a useful name, then click OK. I'm calling mine CenterAcross.
In the VBA editor, Excel will create a code module for you and insert the new sub (macro). Press ALT+F11 to open the VBA editor and see this all happening in real time.
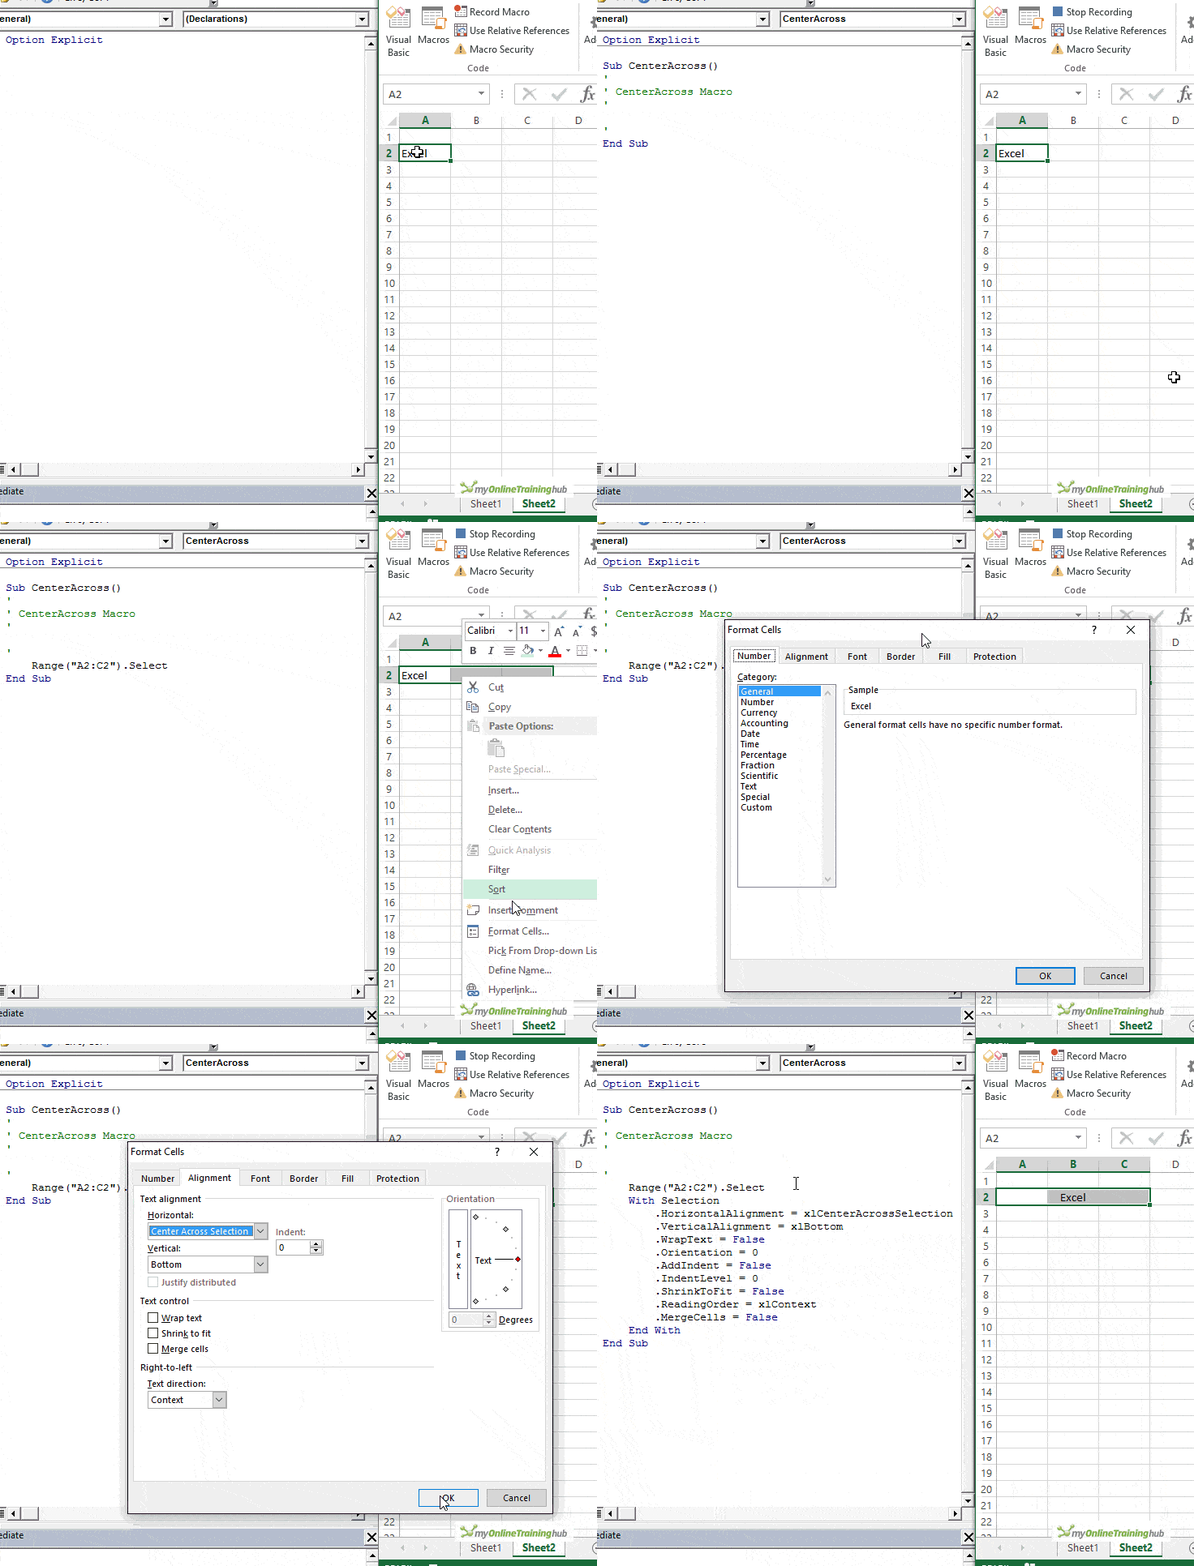
Now we go ahead and perform the steps listed above to center the text across the selected cells. When we are finished we press Stop Recording.
This is how it looks when I did it. On the left is the VBA editor with the macro recorder generating code, as I work in Excel.
Editing the Macro
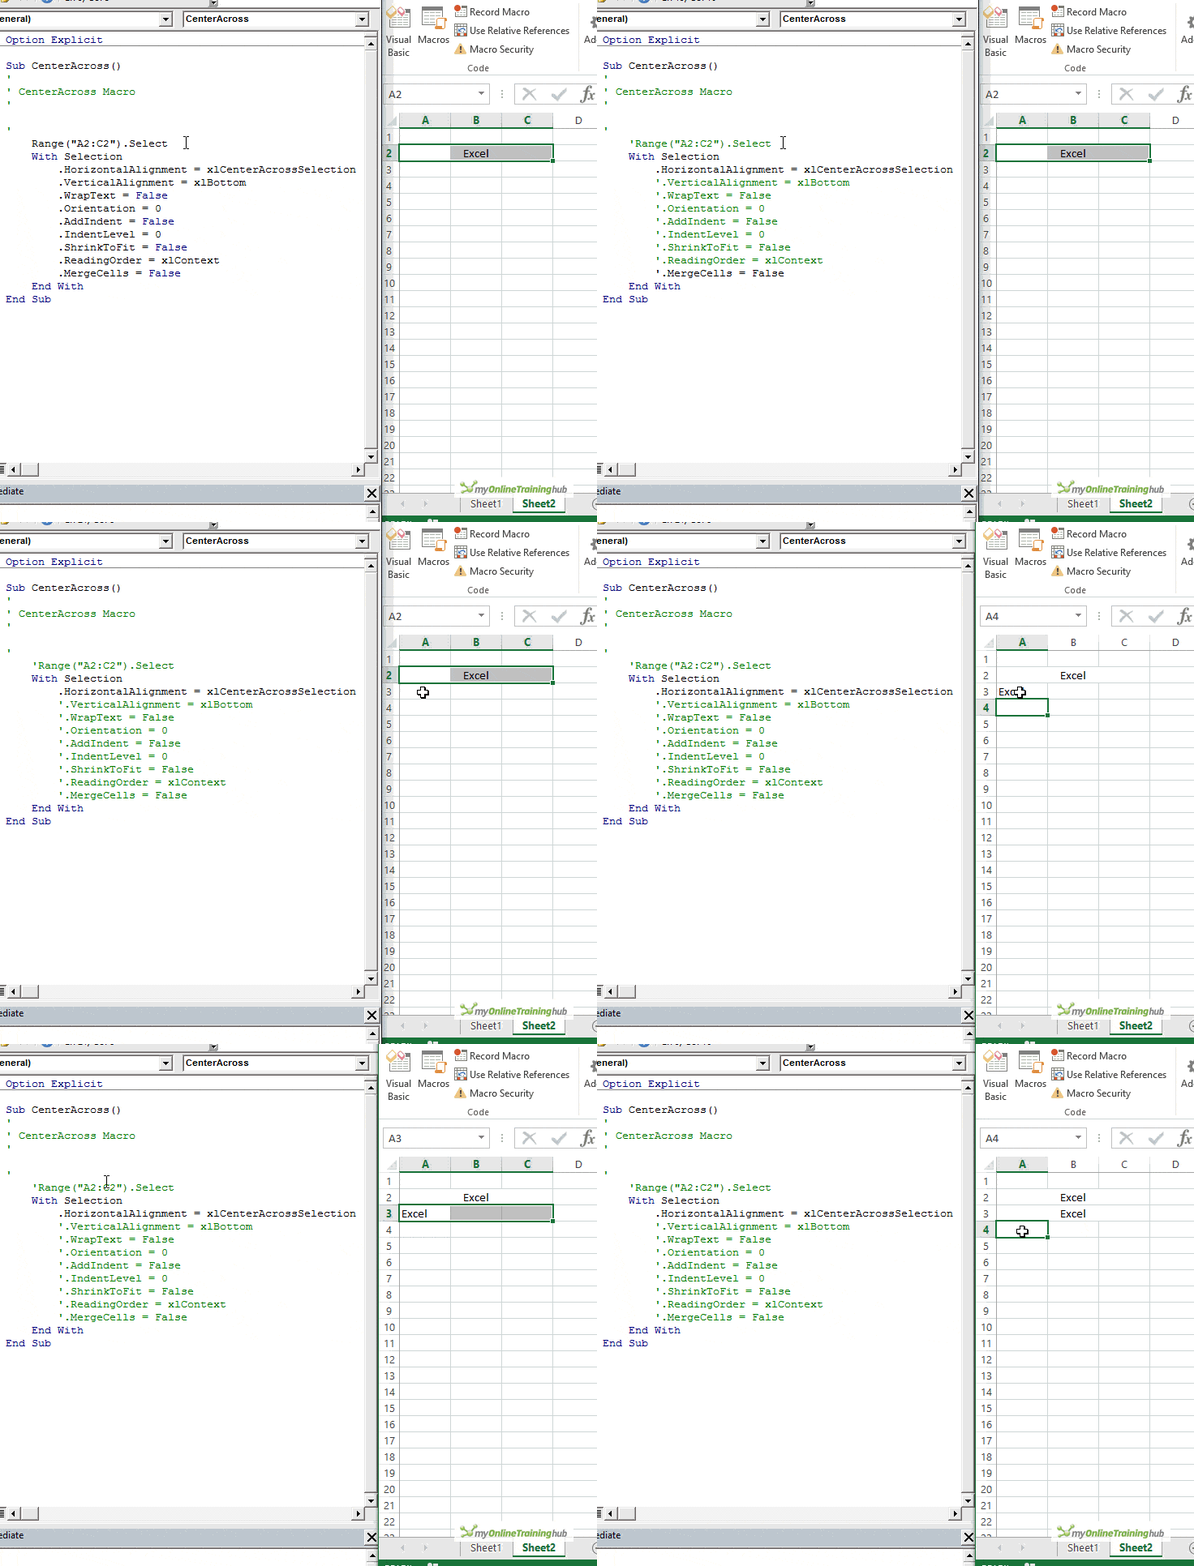
One of the things with the macro recorder is that is inefficient. In the code it generates it includes lines that actually don't do anything. Looking at the code above you might figure out that it's the line .HorizontalAlignment = xlCenterAcrossSelection that does the centering across the selected cells.
We can comment out almost everything else and the macro still does what we want. But as I already said, by looking at the other lines you can learn VBA. The .WrapText = False controls text wrapping. By changing False to True we can wrap the text in the cells. What do you think .MergeCells = False will do if you set it to True?
So if we comment out all the unnecessary lines we end up with this, which does exactly the same as the original recorded code.
Of course you can just go ahead and delete the lines that are commented out.
Macro 2 - Changing Number Format
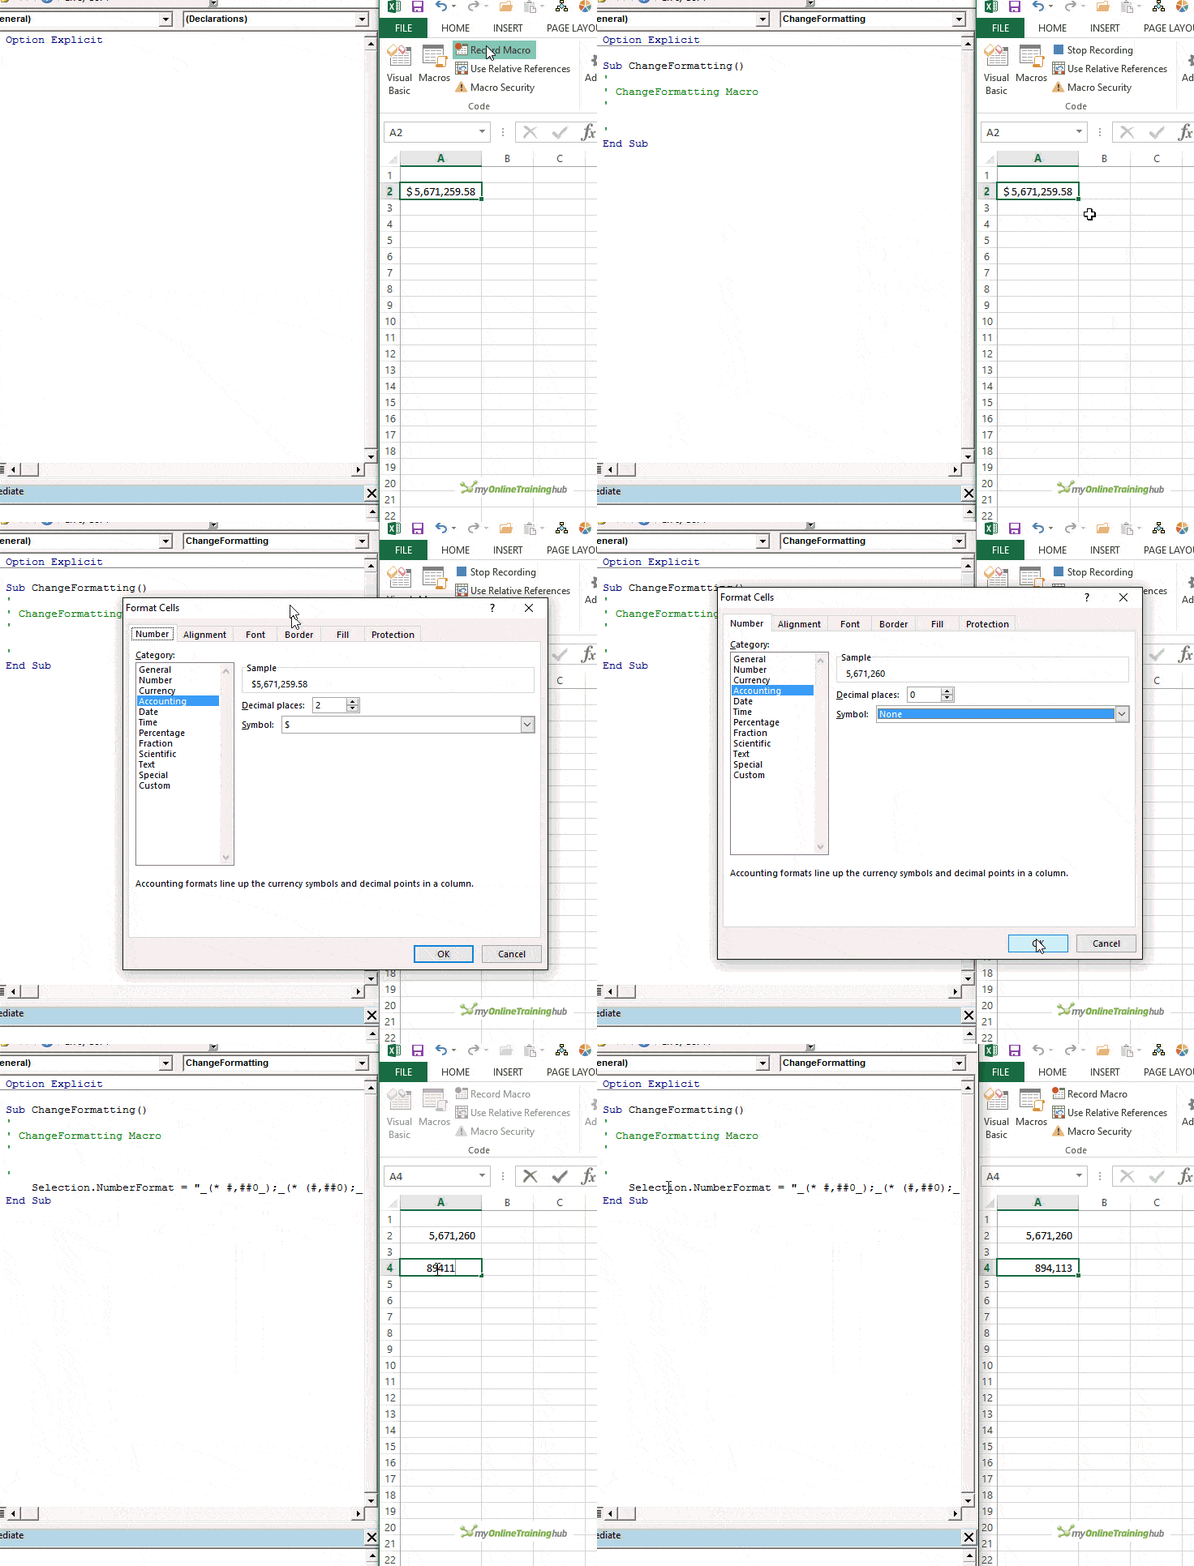
The 2nd problem posted on the forum was about number formatting. This person entered numbers in the default Accounting format, and then modified this so that there was no currency symbol, and no decimal places.
The image below shows me recording the macro, then running it to format another number.
Running The Recorded Macros
Great, we've recorded two macros, we just need to make them easily available so we can run them at any time. There are a couple of ways to do this.
The first is to create an icon on your QAT which runs the macro when it is clicked.
The other is to create a shortcut key-sequence to run the macro.
Using either of these approaches makes it simple to run our macros whenever we want.
Remember to save the file as a macro enabled workbook.
PERSONAL.XLSB
If you want to make the macro available in every workbook you use, then save it into your PERSONAL.XLSB before you start recording it


You might want to add to your instructions the shortcut keys to view the spreadsheet and VBA code side-by-side (WINKEY + Left Arrow) and (WINKEY + Right Arrow).
Thanks Joan, good tip. I have 2 monitors so don’t use this myself but handy for those with 1 screen.
Regards
Phil
I cannot see the macro in the VBA editor. It shows:
Microsoft Excel Objects
Sheet1
ThisWorkbook
Modules
Where is the macro located?
Hi Joan,
Click on Modules and you will see the code modules. Double click on these and you will see the code contained in each one.
Regards
Phil
Great article Phil! I like the center across selection example. I wish there was a button on the ribbon for it, but this is a great example of how simple macros can save us a lot of time. Thanks!
Thanks Jon. Yes there are lots of things like the Center Across example that we can use macros to do for us.
Cheers
Phil