• Skip to main content
  • Skip to header right navigation
  • Skip to site footer

My Online Training Hub

Learn Dashboards, Excel, Power BI, Power Query, Power Pivot

  • Courses
  • Pricing
    • Free Courses
    • Power BI Course
    • Excel Power Query Course
    • Power Pivot and DAX Course
    • Excel Dashboard Course
    • Excel PivotTable Course – Quick Start
    • Advanced Excel Formulas Course
    • Excel Expert Advanced Excel Training
    • Excel Tables Course
    • Excel, Word, Outlook
    • Financial Modelling Course
    • Excel PivotTable Course
    • Excel for Customer Service Professionals
    • Excel for Operations Management Course
    • Excel for Decision Making Under Uncertainty Course
    • Excel for Finance Course
    • Excel Analysis ToolPak Course
    • Multi-User Pricing
  • Resources
    • Free Downloads
    • Excel Functions Explained
    • Excel Formulas
    • Excel Add-ins
    • IF Function
      • Excel IF Statement Explained
      • Excel IF AND OR Functions
      • IF Formula Builder
    • Time & Dates in Excel
      • Excel Date & Time
      • Calculating Time in Excel
      • Excel Time Calculation Tricks
      • Excel Date and Time Formatting
    • Excel Keyboard Shortcuts
    • Excel Custom Number Format Guide
    • Pivot Tables Guide
    • VLOOKUP Guide
    • ALT Codes
    • Excel VBA & Macros
    • Excel User Forms
    • VBA String Functions
  • Members
    • Login
    • Password Reset
  • Blog
  • Excel Webinars
  • Excel Forum
    • Register as Forum Member

Tips for Using The Power Query Advanced Editor

You are here: Home / Power Query / Tips for Using The Power Query Advanced Editor
power query advanced editor tips
October 28, 2021 by Philip Treacy

If you've only ever used the user interface (Ribbon and menus) to create your transformations then you're missing out on some neat things you can do by using the Power Query Advanced Editor.

In this post I'd like to show you what's in the Advanced Editor, how you can write code in it and hopefully make you a bit more confident to use it when needed.

These tips are for Power Query in both Excel and Power BI , but I'll be using Excel to demonstrate.

Watch the Video

Subscribe YouTube


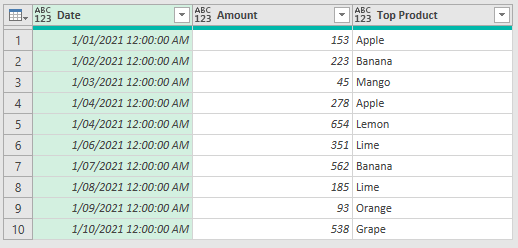
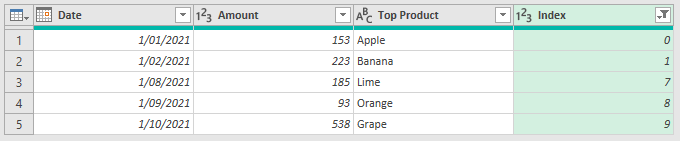
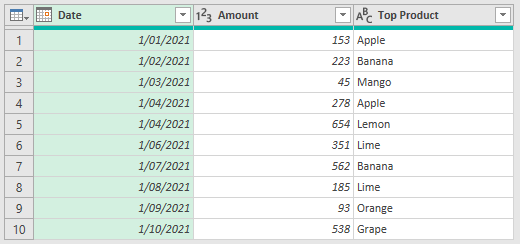
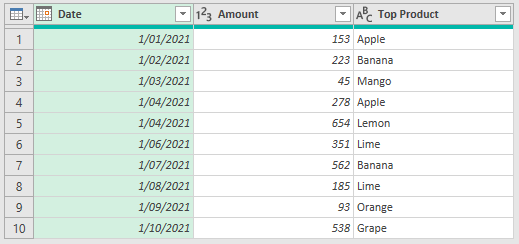
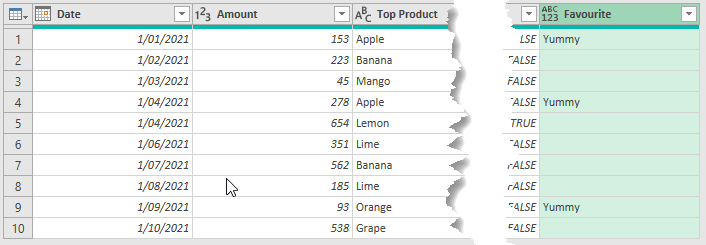
Here's my dummy data loaded into Power Query from a table in an Excel workbook.

dummy data

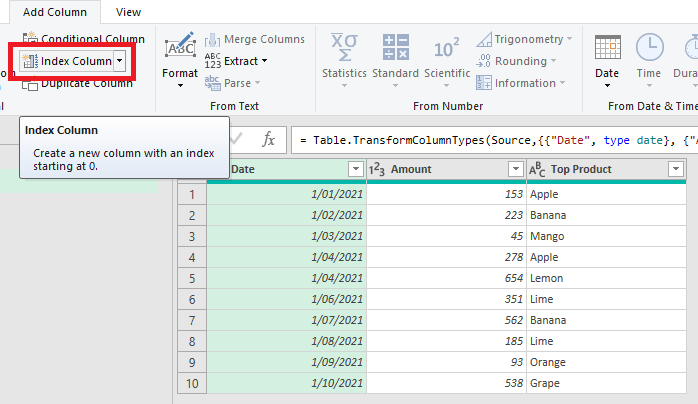
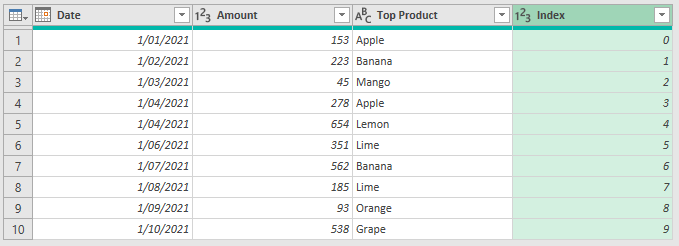
When you add a step, typically you are working with columns and rows in a table.

Like adding a column

adding an index column

index column added

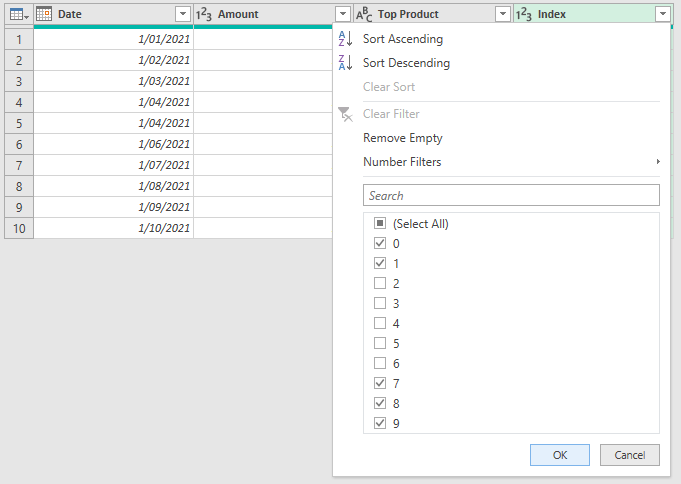
or filtering out rows.

filtering rows

filtered rows

The GUI (Graphical User Interface) takes care of the code underneath - it writes the M code to do what you want.

code in advanced editor

But you can use the Advanced Editor to modify the code the GUI creates, or write your own steps.

Code Structure in the Advanced Editor

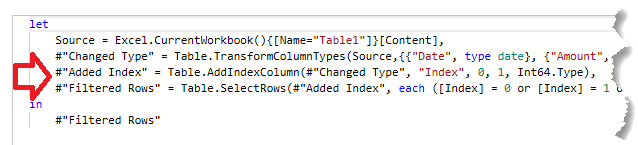
The code for a typical query will look like this

power query typical steps

The code is separated into two sections, the code after the let keyword and the code after the in keyword.

The lines of code after let are your transformation steps. The line after in tells the query what to return as the result of the query.

Each step has its own line, and each step ends in a comma, except the step before the in keyword.

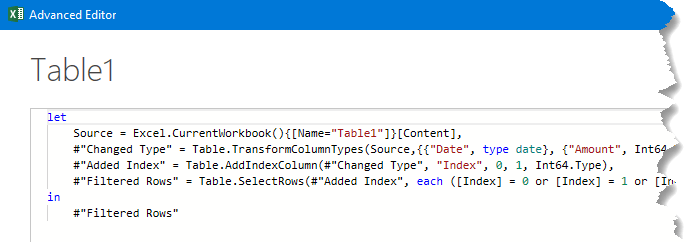
But, steps don't have to be on their own line. If I edit the code so that there are multiple steps on a single line, but each step is still separated by a comma

steps on single line

the query still works. Obviously though, having a single step on each line helps with readibility of the code.

Step Naming Conventions

Step names must be unique.

Steps created by the GUI typically have a name like #"Step Name". Although step names containing spaces must be enclosed in double quotes and preceded by a #, the auto-generated step names do not have to be like this.

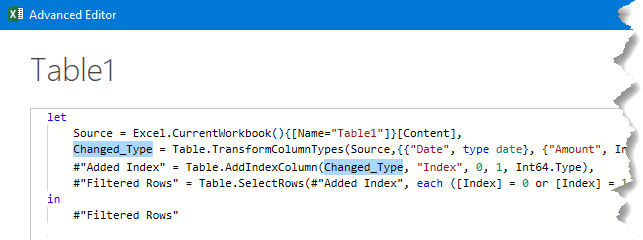
If you want to change the step name, for example the #"Changed Type" step, it can be changed to Changed_Type and the step still works fine.

But if you reference that old step name anywhere (usually in the next step) you need to change that to the new name too.

change step name

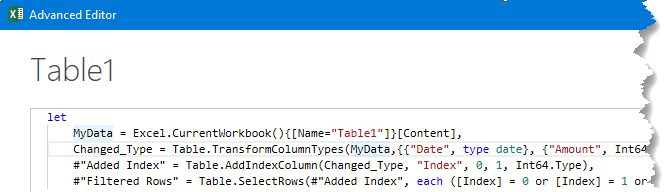
Source is typically the name of the first step, but you can rename it to something else, here I've renamed it to MyData.

rename source step

The Query Result

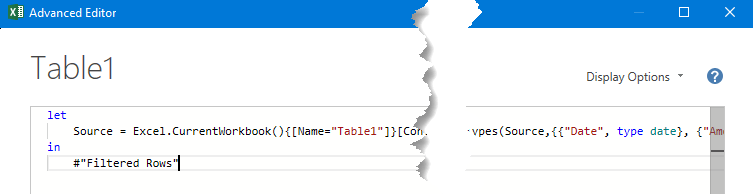
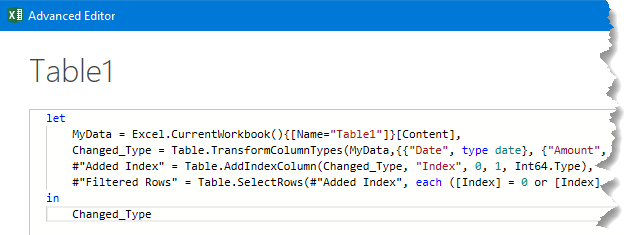
The result of the query is specified by the in keyword. Whatever step is named here is what the query returns.

Changing the name of the step following the in keyword causes the query to return the result of that step.

Changing the query result

result of query changed

Manually Writing Code

Typically each step results in a table but that's not always the case.

Let's say I want to work out the total of the values in the Amount column. First I'll delete the Filtered Rows and Added Index steps so I'm left with this table

unchanged data table

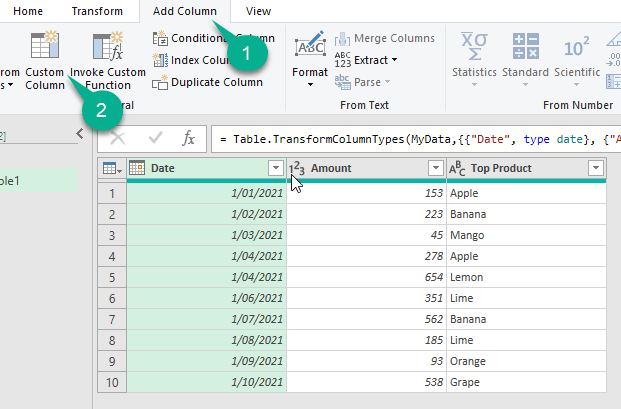
I can select the Amount column and from the Transform tab, Statistics, click on Sum.

add sum column

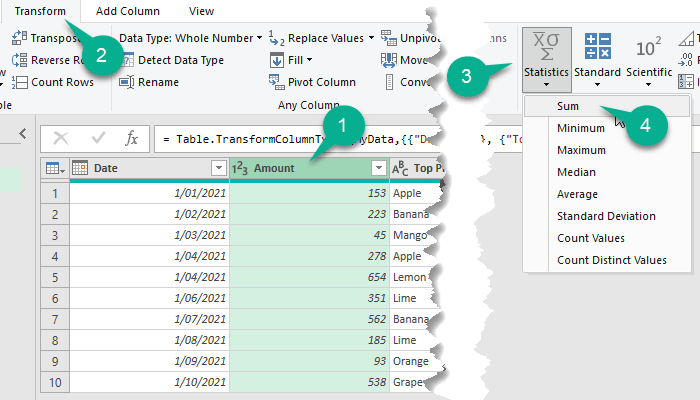
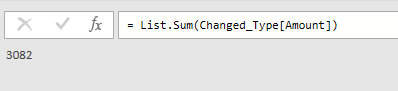
This gives me a single value, the total of the values in the Amount column, and this is now the result of the query.

total of amount column

This isn't actually what I want as the query result, but I do want the Amount total to use for later calculations.

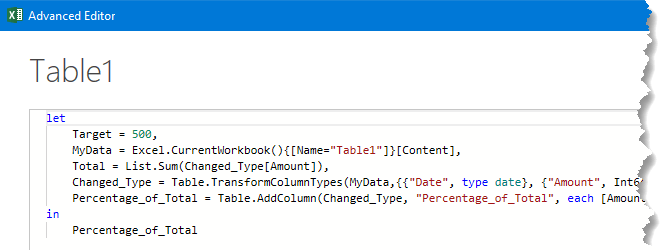
If I go into the Advanced Editor, first I rename #"Calculated Sum" to Total. Then I move this step above the Changed_Type step, and change the step returned by the query to be Changed_Type

rearrange steps

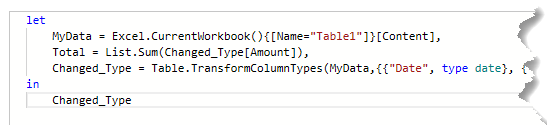
and the query now returns a table again, the result of the Changed_Type step.

But the Total step contains the total of the Amount column, and it gets these values from the step that comes after it. It might seem strange that these steps are 'out of order', but that's the way Power Query works.

I can add a Custom Column and use the value in Total to calculate the percentage each value in Amount contributes to the Total.

add a custom column

Using the GUI here the code looks like this

percentage of total

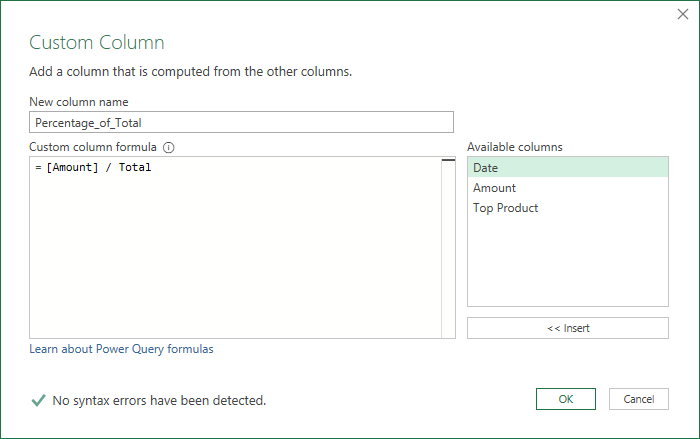
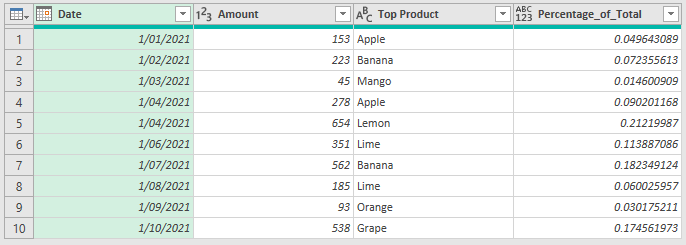
Giving me a new column showing the percentage (as a decimal here) that the Amount on that row contributes to the Total of the Amount column.

percentage of total column

NOTE : I know I could also add a Custom Column and use List.Sum on the Amount column, but I'm just illustrating what can be done using the Advanced Editor.

Let's look at another example where I can use a step to store a value for later calculations.

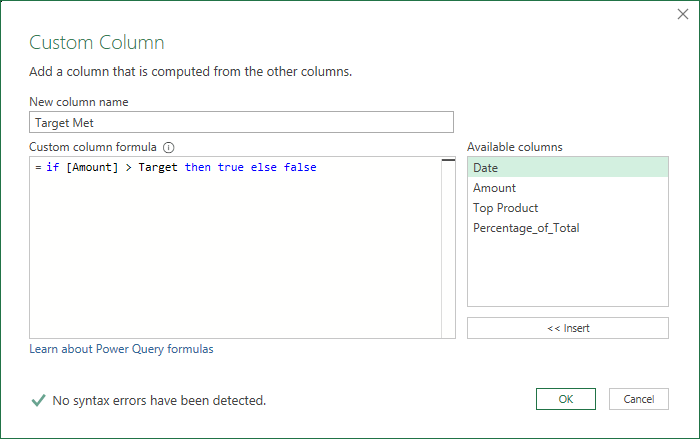
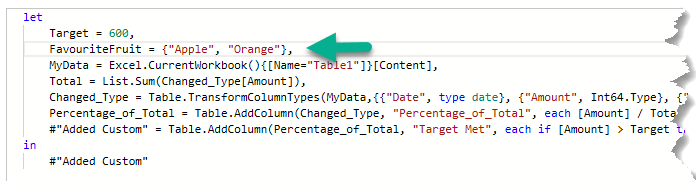
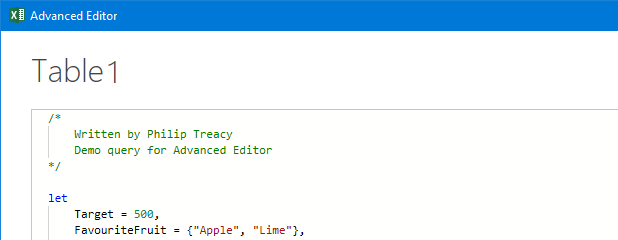
Create a new step in the Advanced Editor called Target and set it equal to 500. I'll use this to create a new column that shows what Amounts are above this constant value.

create step to hold constant value

Close the Advanced Editor and then create a new Custom Column with this code

custom column target check

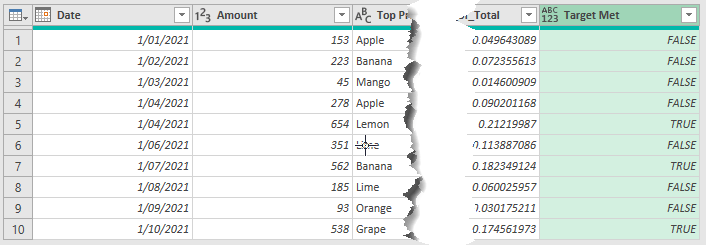
this shows that 3 rows exceeded the Target.

target met column

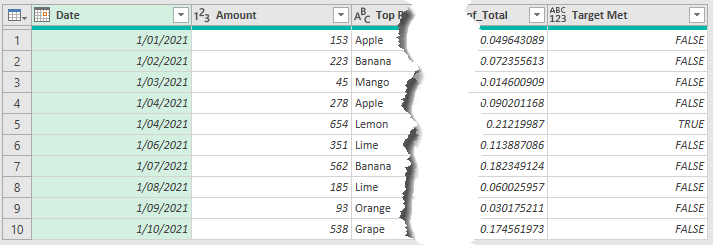
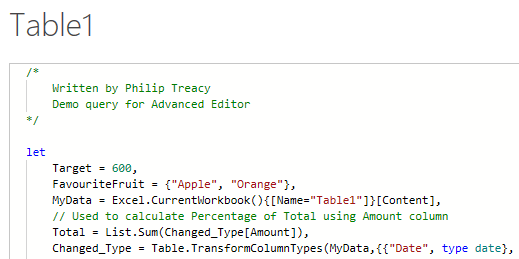
If I edit the Target value to be 600

edit target value

I don't need to change any other code but the query result changes to show that now only 1 row exceeds the Target.

new target met

Note: You could also edit the Target value by selecting the Target step in the Applied Steps list and changing the value in the formula bar

As I've shown, steps can result in not just tables, but also values like numbers and text, and even lists and records.

I'll show one more example using a step to hold a list.

In the Advanced Editor create a new step called Favourite_Fruit and set this to equal a list consisting of Apple and Orange.

step containing a list

After closing the Advanced Editor create a new Custom Column and the code here uses the List.ContainsAny function. What it is doing is checking if the Top Product is in the list in FavouriteFruit, that is, is the Top Product either Apple or Orange.

column showing favourite fruit

column showing fruit

Comments

Comments can be added via the Advanced Editor. You can have multi line comments or single line comments.

Multi line comments are surrounded by /* */ so if I wanted to add some comments to the top of the code I can do so like this

multi line comment

Single line comments start with // and can be used to not only add some useful information to the code as you are reading it, they become tool tips for the step that follows.

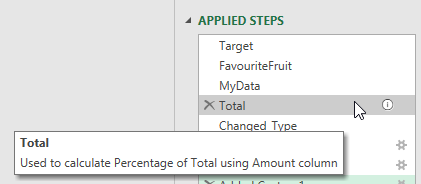
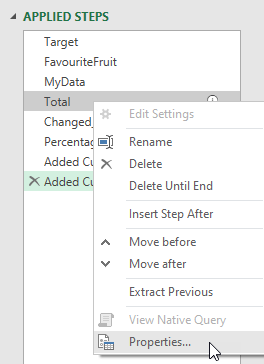
If I add a single line comment above the Total step, then close the Advanced Editor

single line comment

The Total step now has a small i (information) icon beside it. This indicates that there's a tool tip available for it, and by hovering the mouse pointer over it, it appears.

single line comment tooltip

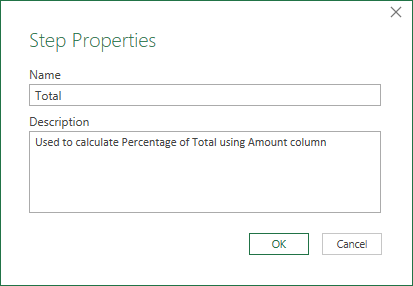
This single line comment also becomes the Description for the step properties

step properties

step properties description

Functions

Lastly let's look at writing an 'in-line' function. It's described as 'in-line' because it's not a separate query, it's in line with the other lines of code of the main query.

I'll write a simple function called Double that doubles any numeric value it receives.

Towards the top of the Advanced Editor window I enter the function code, here's an explanation of the function structure.

in line function

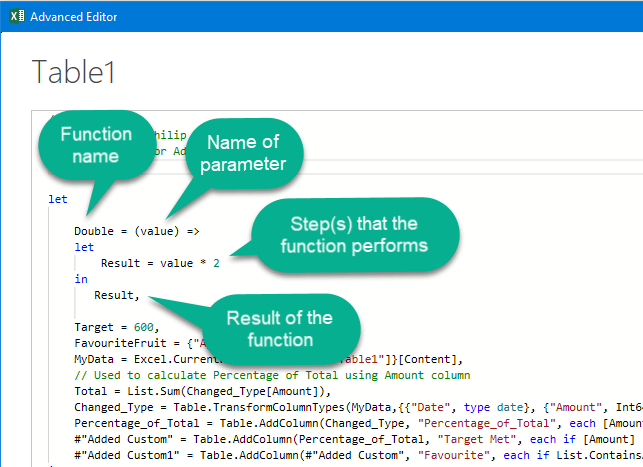
Closing the Advanced Editor just saves the function code into the query, in order to use the function I need to call it like any other function and I can do this in a new Custom Column.

By calling the function and passing in the value from the current row of the Amount column

calling the function

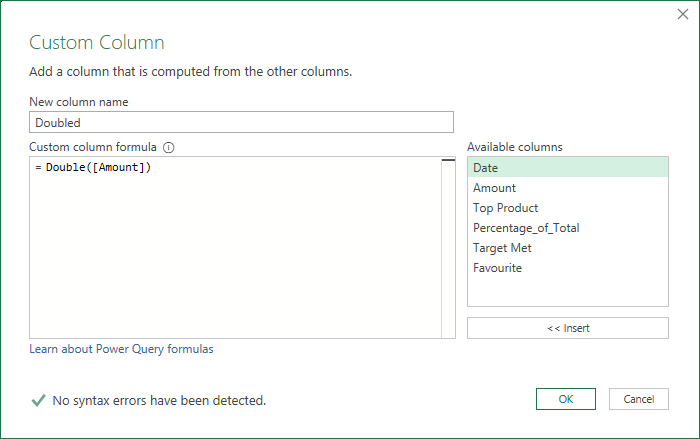
My table now has a new column containing the Amount values multiplied by 2.

column containing doubled values

Conclusion

Understanding what you see in the Advanced Editor and how to write and modify code in there allows you to do some things that you can't do using the GUI alone.

I hope this has helped you understand this and makes you more confident to use it to write M code.

power query advanced editor tips

More Power Query Posts

Power Query if Statements incl. Nested ifs, if or, if and

How to write Power Query if statements, including nested if, ‘if or’ and ‘if and’, which are easier to write than their Excel counterparts.
power query variables

Power Query Variables 3 Ways

Power Query Variables enable you to create parameters that can be used repeatedly and they’re easily updated as they’re stored in one place.
delete empty rows and columns using power query

Remove Blank Rows and Columns from Tables in Power Query

Delete blank rows and columns from tables using Power Query. Even rows/columns with spaces, empty strings or non-printing whitespace
extracting data from lists and records in power query

Extracting Data from Nested Lists and Records in Power Query

Learn how to extract data from lists and records in Power Query, including examples where these data structures are nested inside each other.
combine files with different column names in power query

Combine Files With Different Column Names in Power Query

Learn how to load data into Power Query when the column names in your data don't match up. Sampe files to download.
power query keyboard shortcuts

Power Query Keyboard Shortcuts to Save Time

Time saving keyboard shortcuts for Power Query that work in both Excel and Power BI. Download the free Shortcuts eBook
remove text between delimiters power query

Remove Text Between Delimiters – Power Query

Remove all occurrences of text between delimiters. There's no in-built Power Query function to do this, but this code does.
pivot unknown variable number of rows to columns

Pivot an Unknown Number of Rows into Columns

How do you pivot rows to columns when you don't know how many rows you're dealing with? It's not as easy as you may think.
try otherwise power query iferror

IFERROR in Power Query Using TRY OTHERWISE

Using TRY..OTHERWISE in Power Query Replicates Excel's IFERROR So You Can Trap and Manage Errors In Your Queries.
easily compare multiple tables in power query using list functions

Easily Compare Multiple Tables in Power Query

Compare tables or lists in Power Query using List Functions. This method is great when dealing with 3 or more tables or lists.


Category: Power Query
Previous Post:Excel Hash Spill OperatorHash Sign in Excel Formulas
Next Post:Remove Text Between Delimiters – Power Queryremove text between delimiters power query

Reader Interactions

Leave a Reply Cancel reply

Your email address will not be published. Required fields are marked *

Current ye@r *

Leave this field empty

Sidebar

More results...

Featured Content

  • 10 Common Excel Mistakes to Avoid
  • Top Excel Functions for Data Analysts
  • Secrets to Building Excel Dashboards in Less Than 15 Minutes
  • Pro Excel Formula Writing Tips
  • Hidden Excel Double-Click Shortcuts
  • Top 10 Intermediate Excel Functions
  • 5 Pro Excel Dashboard Design Tips
  • 5 Excel SUM Function Tricks
  • 239 Excel Keyboard Shortcuts

100 Excel Tips and Tricks eBook

Download Free Tips & Tricks

Subscribe to Our Newsletter

Receive weekly tutorials on Excel, Power Query, Power Pivot, Power BI and More.

We respect your email privacy

Guides and Resources

  • Excel Keyboard Shortcuts
  • Excel Functions
  • Excel Formulas
  • Excel Custom Number Formatting
  • ALT Codes
  • Pivot Tables
  • VLOOKUP
  • VBA
  • Excel Userforms
  • Free Downloads

239 Excel Keyboard Shortcuts

Download Free PDF

Free Webinars

Excel Dashboards Webinar

Watch our free webinars and learn to create Interactive Dashboard Reports in Excel or Power BI

Click Here to Watch Now

mynda treacy microsoft mvpHi, I'm Mynda Treacy and I run MOTH with my husband, Phil. Through our blog, webinars, YouTube channel and courses we hope we can help you learn Excel, Power Pivot and DAX, Power Query, Power BI, and Excel Dashboards.

Blog Categories

  • Excel
  • Excel Charts
  • Excel Dashboard
  • Excel Formulas
  • Excel PivotTables
  • Excel Shortcuts
  • Excel VBA
  • General Tips
  • Online Training
  • Outlook
  • Power Apps
  • Power Automate
  • Power BI
  • Power Pivot
  • Power Query
microsoft mvp logo
trustpilot excellent rating
Secured by Sucuri Badge
MyOnlineTrainingHub on YouTube Mynda Treacy on Linked In Mynda Treacy on Instagram Mynda Treacy on Twitter Mynda Treacy on Pinterest MyOnlineTrainingHub on Facebook
 

Company

  • About My Online Training Hub
  • Disclosure Statement
  • Frequently Asked Questions
  • Guarantee
  • Privacy Policy
  • Terms & Conditions
  • Testimonials
  • Become an Affiliate

Support

  • Contact
  • Forum
  • Helpdesk – For Technical Issues

Copyright © 2023 · My Online Training Hub · All Rights Reserved. Microsoft and the Microsoft Office logo are trademarks or registered trademarks of Microsoft Corporation in the United States and/or other countries. Product names, logos, brands, and other trademarks featured or referred to within this website are the property of their respective trademark holders.