You’ve built an Excel template to save time and reduce errors.
But explaining how to use it is starting to take just as long.
Creating documentation usually means writing instructions, taking screenshots, or recording separate videos. That process is slow, repetitive, and difficult to maintain.
There is a faster approach. Instead of documenting after the fact, you can capture your workflow as you use it and instantly turn it into a step-by-step guide.
In this tutorial, you’ll learn how to do exactly that using Scribe.
Table of Contents
- Watch the Video
- Why Traditional Excel Documentation Slows You Down
- A Better Approach: Record Once, Document Automatically
- Step 1: Start Recording Your Excel Workflow
- Step 2: Let the Guide Build Itself
- Step 3: Finish and Review Your Guide
- Step 4: Enhance Your Guide with Visual Edits
- Step 5: Collaborate with Your Team
- Step 6: Use AI to Improve Your Workflow
- Step 7: Share Your Guide Anywhere
- Step 8: Export for Offline Use
- Step 9: Organise Guides with Scribe Pages
- Step 10: Track Usage with Analytics
- Why This Matters for Excel Users
- Try It Yourself
Watch the Video

Why Traditional Excel Documentation Slows You Down
If you’ve ever created a “how to” guide for an Excel file, you already know the pain points:
- Taking screenshots for every step
- Writing instructions that match each image
- Updating documents when the process changes
What you need is a way to document once and reuse forever.
A Better Approach: Record Once, Document Automatically
Instead of manually creating instructions, you can record your workflow while using Excel.
As you click, type, and navigate, each step is captured and turned into a structured guide with screenshots and instructions.
That means:
- No manual screenshots
- No writing step-by-step instructions
- No duplication of effort
This is where Scribe comes in. It captures your process in real time and builds the guide for you.
Step 1: Start Recording Your Excel Workflow
Open the Scribe desktop app and start a new capture.
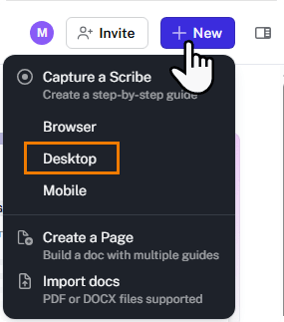
Select your Excel workbook and begin using it exactly as you normally would.
There is no need to slow down or adjust your behaviour. The tool captures everything in the background.
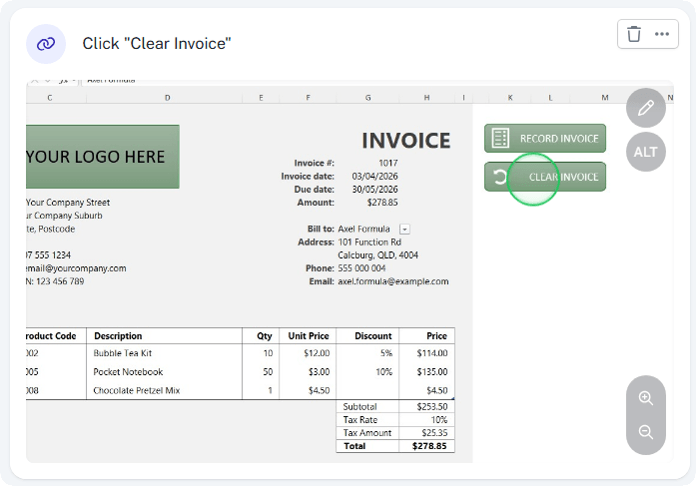
Step 2: Let the Guide Build Itself
As you work, Scribe generates a live preview of your guide.

Each action becomes a step with:
- A screenshot
- A clear instruction
- Visual highlights showing exactly where to click
This is the key advantage. You are not writing anything. The documentation is created automatically as you work.
If part of the process is repetitive, you can pause recording and resume when needed.
Step 3: Finish and Review Your Guide
Once your workflow is complete, stop recording.
You will be taken to the Scribe editor where you can quickly refine the guide.
Typical edits include:
- Renaming the title
- Adjusting descriptions
- Removing duplicate or unnecessary steps
- Reordering steps
You can also zoom, pan, and annotate screenshots to improve clarity.
This editing stage usually takes minutes, not hours.
Step 4: Enhance Your Guide with Visual Edits
The editor gives you full control over how each step looks.

You can:
- Zoom in on key areas
- Highlight buttons or fields
- Add annotations
- Redact sensitive information
These adjustments help ensure your guide is easy to follow, even for beginners.
Step 5: Collaborate with Your Team
Documentation rarely stays static.
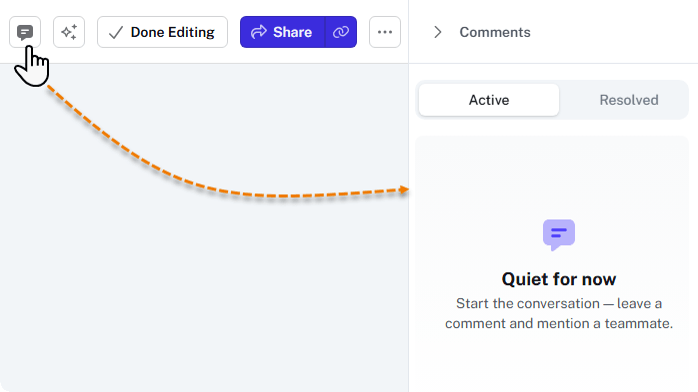
With Scribe, your team can:
- Leave comments on specific steps
- Suggest updates
- Edit workflows as processes evolve
This removes the need to recreate documentation every time something changes.
Step 6: Use AI to Improve Your Workflow
Scribe includes AI suggestions to help refine your process.
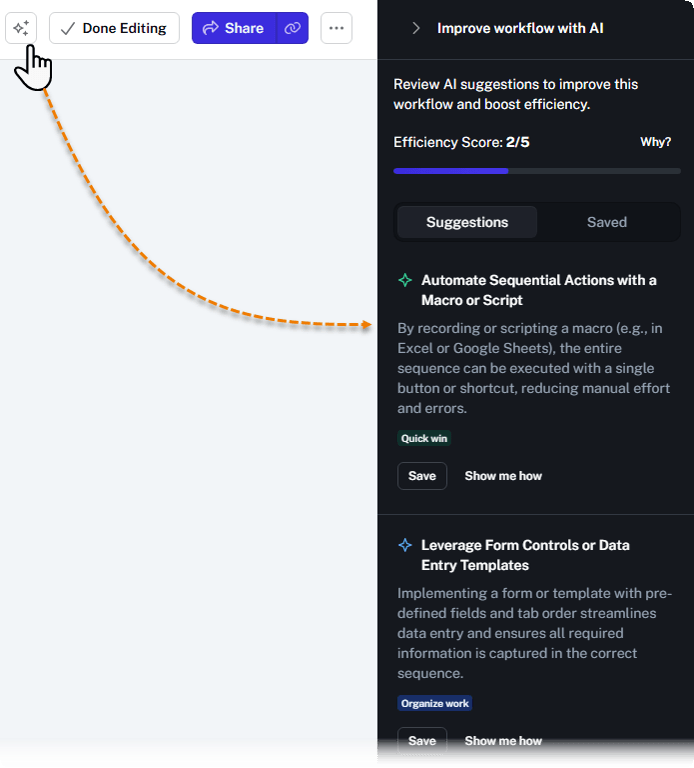
It can highlight:
- Inefficiencies
- Potential errors
- Opportunities to simplify steps
You should treat these suggestions as guidance, not instructions.
For example, it may suggest using macros even if you already have them implemented. Always apply your own judgement.
Step 7: Share Your Guide Anywhere
Once your guide is ready, you can share it in multiple ways:
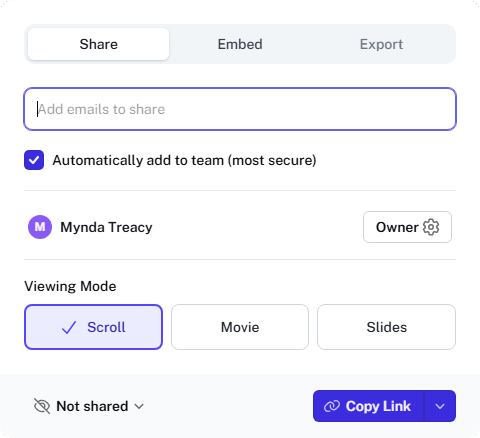
- Send it directly via email
- Embed it in tools like Teams or SharePoint
- Add it to internal documentation hubs
- Publish it on websites
The embedded version stays up to date automatically. If you update the guide, everyone sees the latest version without needing a new link.
Step 8: Export for Offline Use
If needed, you can export your guide as:
- Word document
- HTML file
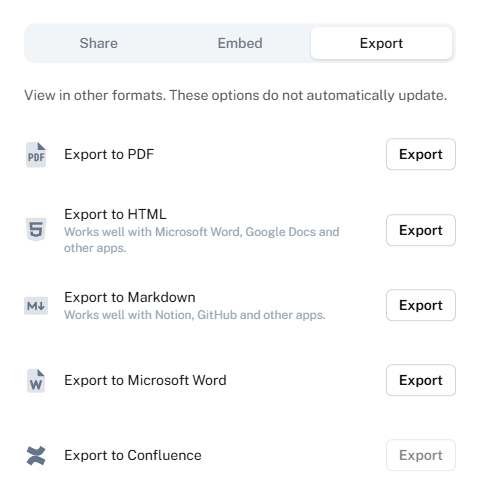
This is useful for compliance, training packs, or offline access.
Step 9: Organise Guides with Scribe Pages
For more complex workflows, you can group multiple guides together.
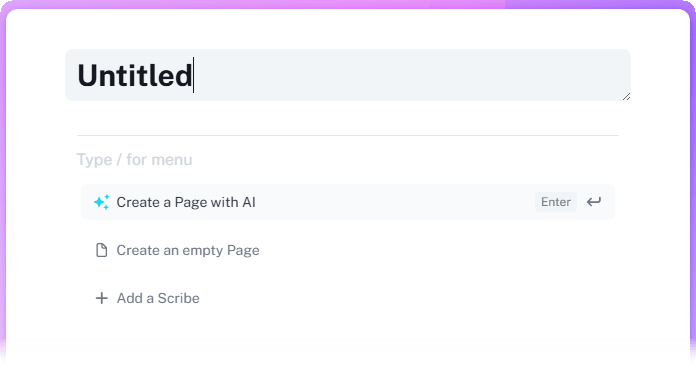
Scribe Pages allow you to combine:
- Step-by-step guides
- Videos
- Supporting documents
This creates a single source of truth for your processes.
Step 10: Track Usage with Analytics
Scribe provides insights into how your guides are being used.
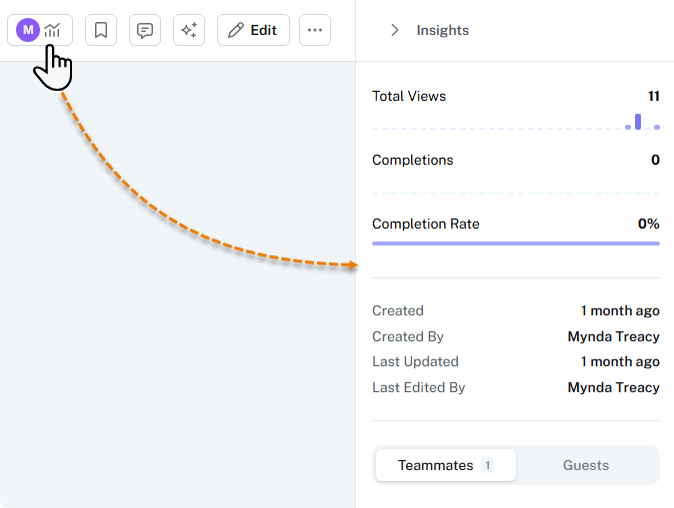
You can see:
- Total views
- Completion rates
- Where users drop off
This helps identify gaps in your documentation and improve training outcomes.
Why This Matters for Excel Users
If you regularly share Excel templates, models, or dashboards, this approach solves a common problem.
Instead of explaining the same steps repeatedly, you:
- Document once
- Share once
- Keep everything consistent
It reduces errors, saves time, and improves adoption of your tools.
Users report saving significant time each month and making fewer mistakes when following structured guides.
Try It Yourself
You can try Scribe for free here: https://scribe.how/MOTH
If you create Excel templates or teach workflows, this is one of the simplest ways to save time while improving how others use your work.

