Most of us use Excel to build powerful solutions. Inventory trackers, CRMs, dashboards, workflow tools. Over time, those workbooks grow. More sheets. More formulas. More complexity.
But what happens when your spreadsheet needs to become something more? When multiple people need access. When data entry needs to happen on a phone. When emailing files back and forth stops working.
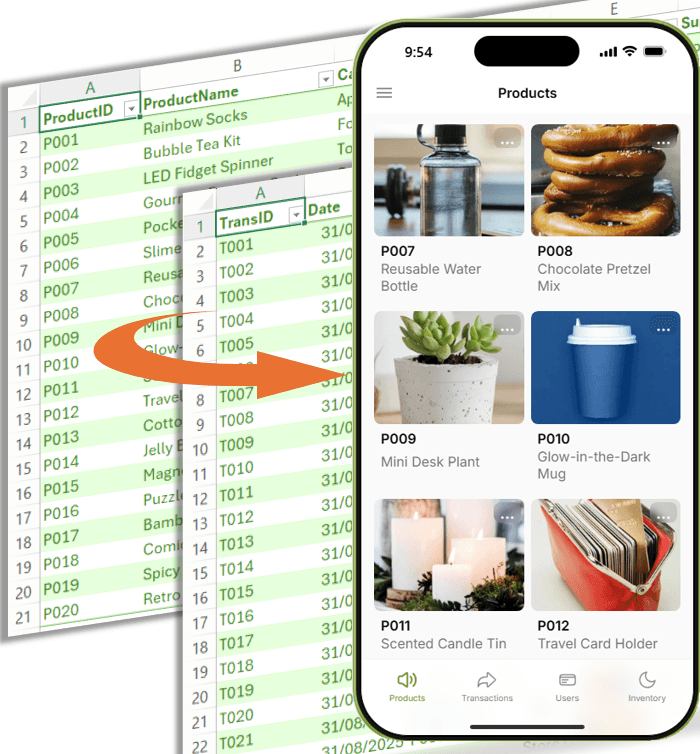
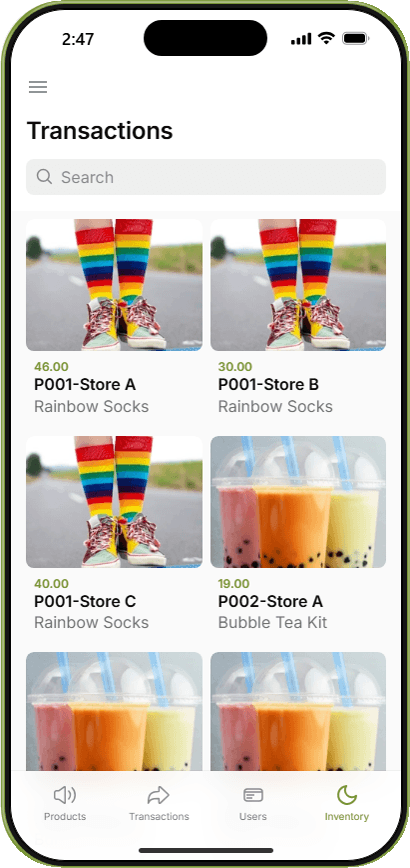
In this tutorial, you will learn how to transform a simple Excel inventory spreadsheet, into the fully working mobile app shown below using Glide. No coding required.
This article is based on the full walkthrough shown in the companion video below.
Sponsored disclosure: This tutorial is created in partnership with Glide. If you use the affiliate link provided, I may earn a commission at no additional cost to you.
Table of Contents
- Watch how to Convert Excel to an App in under 10 Minutes
- Get the Example File and Try Yourself
- What We Are Starting With: An Excel Inventory Spreadsheet
- Step 1: Import Your Excel File Into Glide
- Step 2: Replace Excel Formulas With Glide Logic
- Step 3: Improve Usability With Lookups
- Step 4: Design the App Layout
- Step 5: Build a Mistake Proof Data Entry Form
- Step 6: Test the Inventory Logic
- Step 7: Automate With Integrations
- Why This Matters for Excel Users
- How to Get Started
Watch how to Convert Excel to an App in under 10 Minutes

Get the Example File and Try Yourself
Enter your email address below to download the free file.

What We Are Starting With: An Excel Inventory Spreadsheet
The starting point is a typical Excel setup:
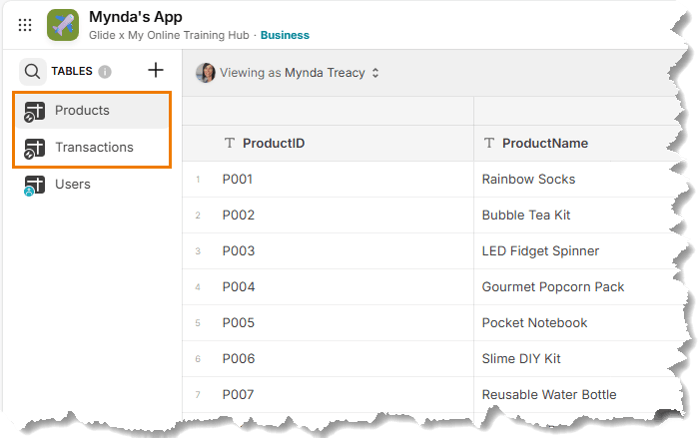
- A Products sheet
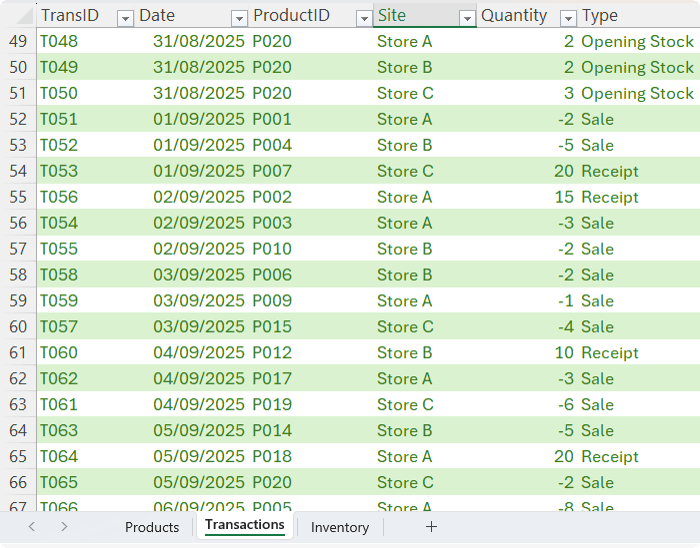
- A Transactions sheet
- An Inventory sheet with formulas
In Excel, calculating stock on hand usually requires:
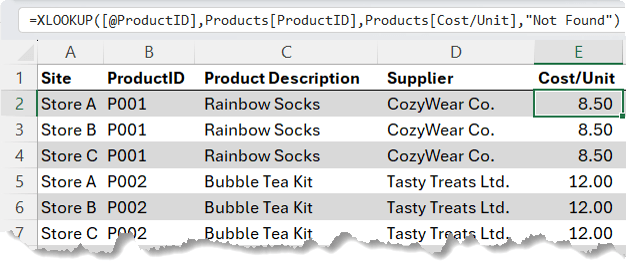
- Lookup formulas to bring product details into the transaction table:
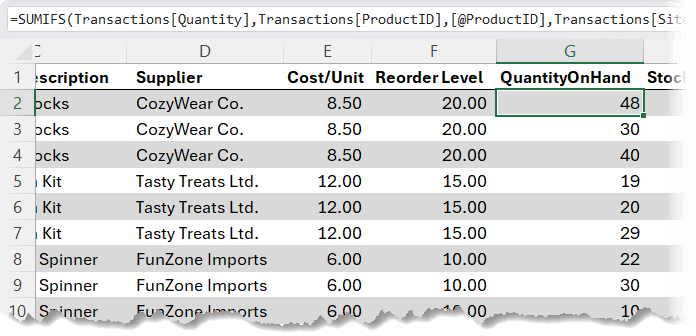
- SUMIFS formulas to calculate stock levels by product and store
This works. But it also means:
- More sheets to maintain
- More formulas to audit
- Greater risk of broken logic
Instead of building and maintaining an Inventory sheet in Excel, we will delete that sheet and let the app calculate stock on the fly and only bring in the Products and Inventory sheets.
Step 1: Import Your Excel File Into Glide
Your Excel File Into Glide
In Glide:
- Click New App
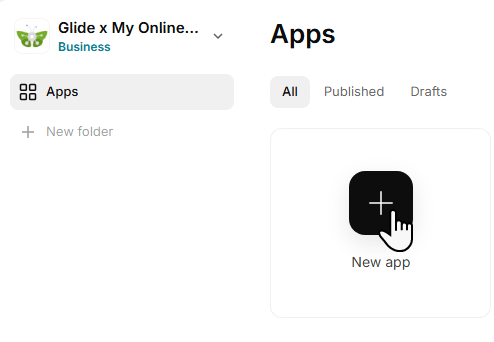
- Choose Import a File
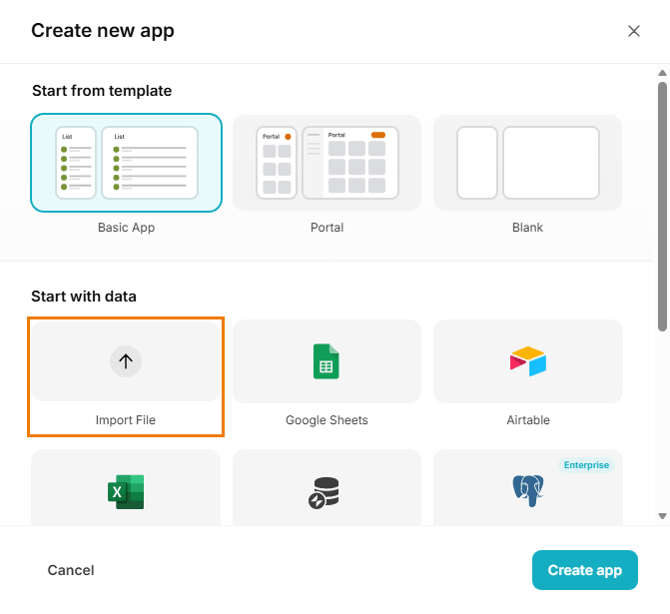
- Upload your Excel workbook
Glide automatically converts each sheet into a data table and instantly generates a working app layout.
You now have:
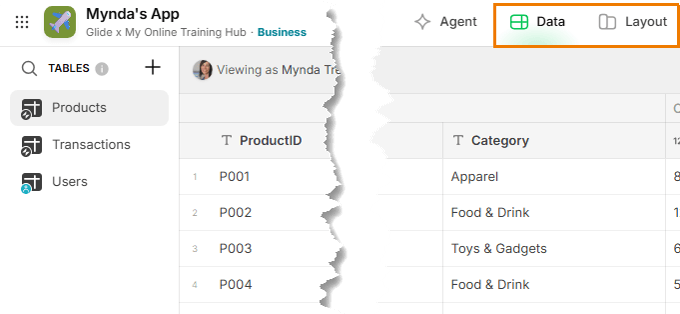
- A Layout view, where you design what users see
- A Data view, where you define relationships and calculations
Step 2: Replace Excel Formulas With Glide Logic
In Excel, your stock on hand formula might look like this:
= SUMIFS(Transactions[Quantity],Transactions[ProductID],[@ProductID],Transactions[Site],[@Site])
In Glide, you achieve the same result without writing formulas.
Create a Product Site Key
First, create a key that uniquely identifies each Product and Store combination.
Add a Template column in the Transactions table:
ProductID – Site
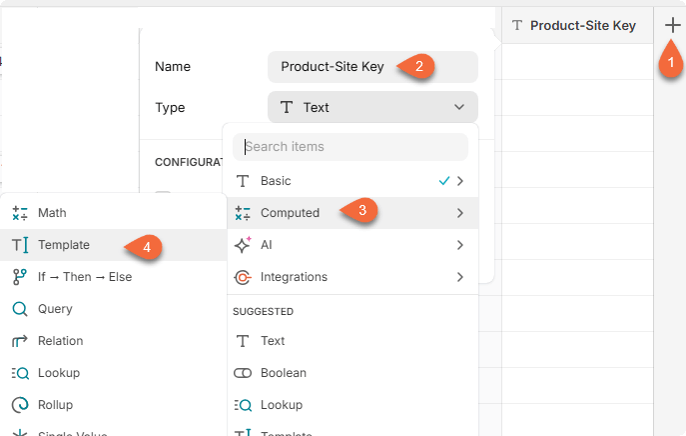
This is equivalent to a helper column in Excel.
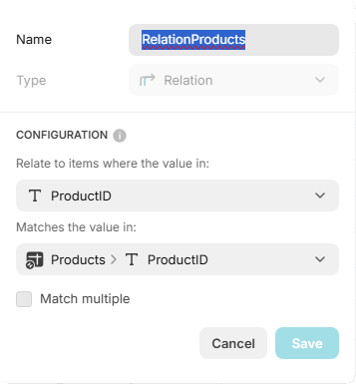
Create a Relation
Next, add a Relation column:
- Match Product Site Key in this row
- To Product Site Key in Transactions
- Enable Match multiple

This creates a dynamic link to all transactions for that product and store.
Create a Rollup
Add a Rollup column:
- Relation: AllTransForKey
- Field: Quantity
- Aggregation: Sum

This instantly calculates Stock On Hand. It performs the same job as SUMIFS, but through structured relationships instead of cell formulas.
Step 3: Improve Usability With Lookups
Product IDs are great for data integrity. They are not great for users.
To make the app more intuitive:
- Create a Relation from Transactions to Products using ProductID
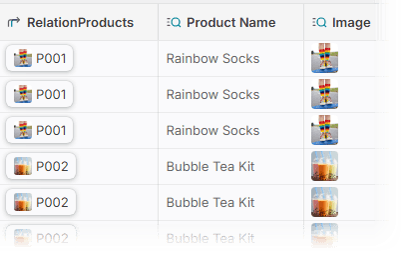
- Add a Lookup column to pull in Product Name
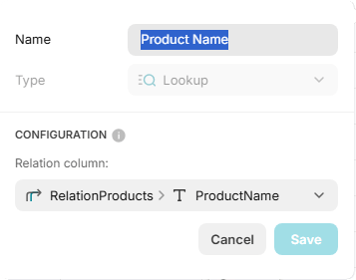
- Add another Lookup to pull in the Product Image

Now the app shows meaningful product names and images instead of raw IDs.
Step 4: Design the App Layout
In Layout view, you can customise how information is presented.
For the Transactions screen:
- Title: Transaction ID
- Description: Product Name
- Image: Product Image
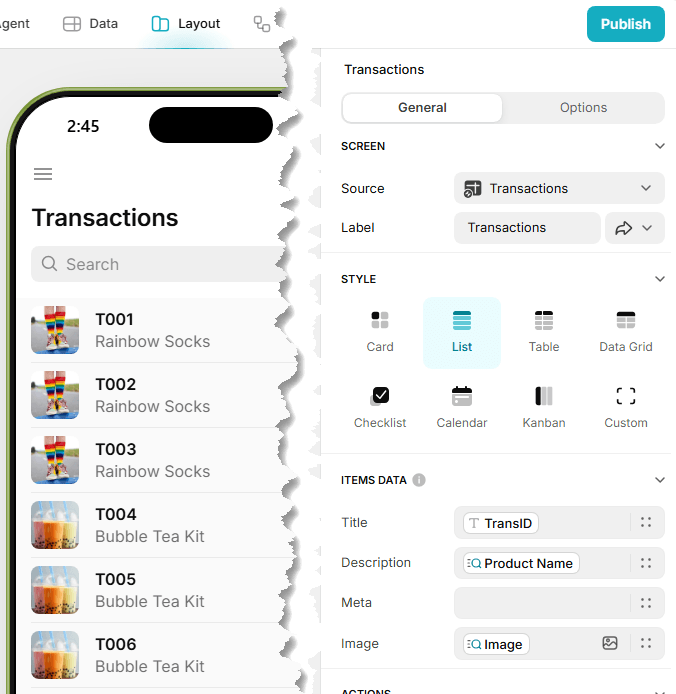
This creates a clean, scannable transaction log.
Create a Dedicated Inventory Screen
Instead of a formula sheet, create a new screen:
- Add a Custom tab

- Name it Inventory
- Display Product Site Key, Product Name and StockOnHand
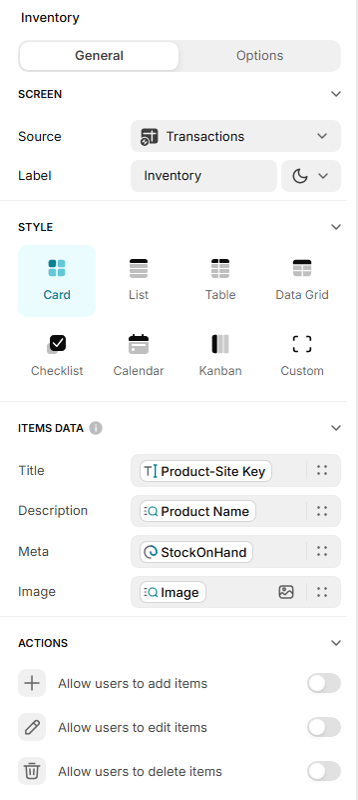
You now have a live inventory summary built from transaction data:
Same data. Different presentation.
Step 5: Build a Mistake Proof Data Entry Form
When you add a new transaction, Glide auto generates a form. You can refine it, adding and removing components:

Transaction ID: Set this to a Special Value using Unique Identifier so users do not have to manually enter IDs.
Date: Use a Date Picker component to ensure consistent formatting.
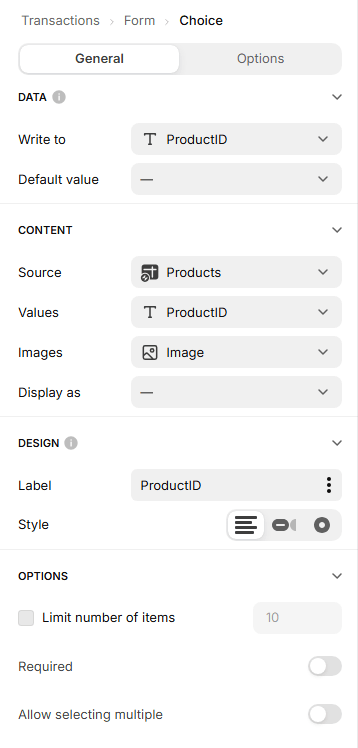
Product: Change ProductID to a Choice component:
- Source: Products
- Display: Product Name
- Stored value: ProductID
Site: Use another Choice component for Store selection. Chips style works well for clarity.
Quantity: Keep this as a number field. Add a placeholder note:
“Sales are negative. Stock received is positive.”
This reduces user error and keeps your logic consistent.
Step 6: Test the Inventory Logic
Check the current stock level for a product at a specific store.
Add a new transaction:
- Product: P001
- Site: Store A
- Quantity: -2
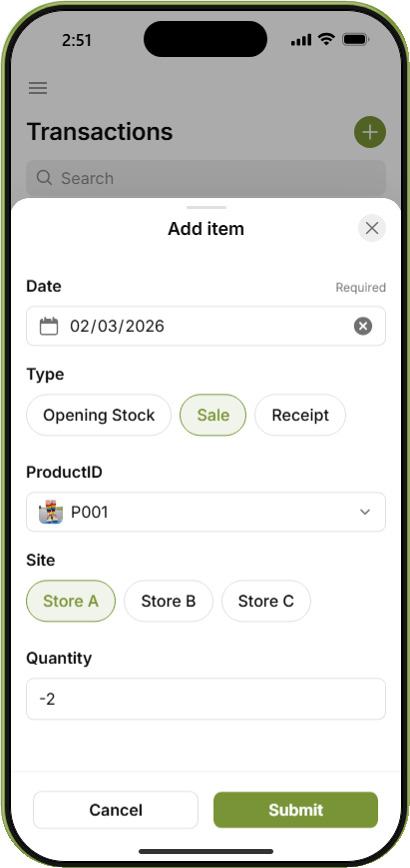
Save.
The Inventory screen updates immediately. The rollup recalculates automatically.
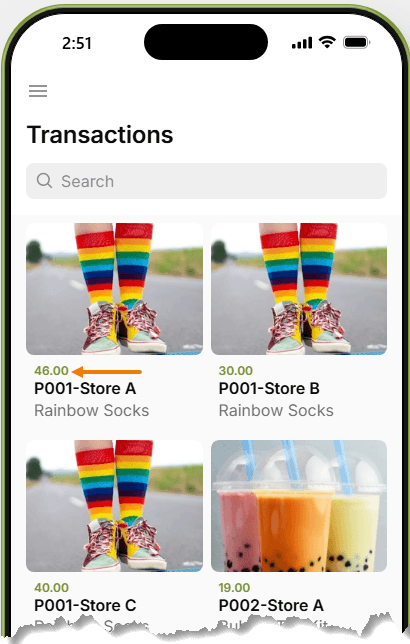
No manual refresh. No formula auditing. No risk of overwriting a cell.
Step 7: Automate With Integrations
Manual entry works. Automation is better.
In Settings, go to Integrations.
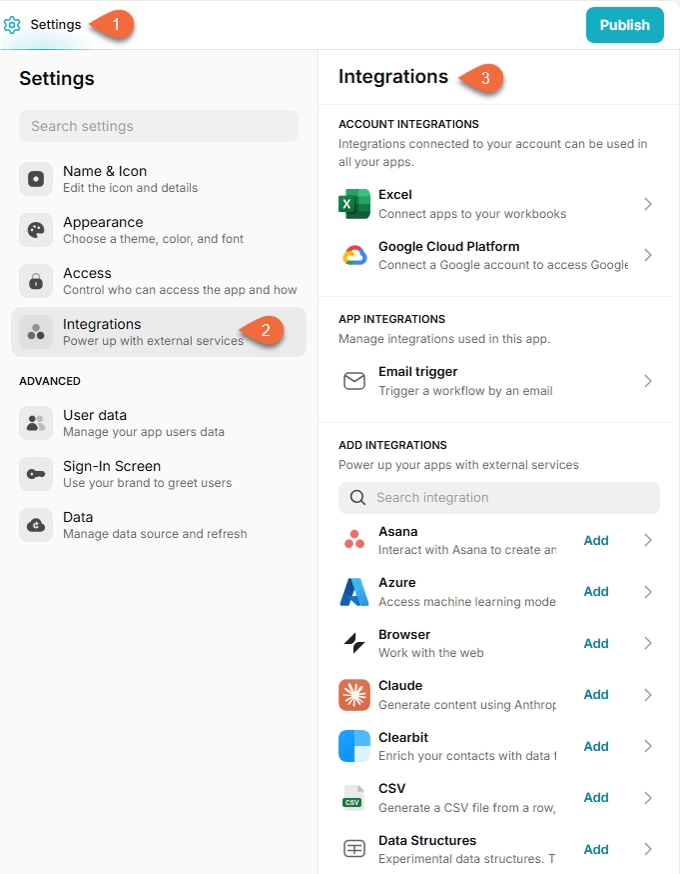
You can connect Glide to:
- POS systems
- Online stores
- Email triggers
- Other business tools
Instead of someone typing each stock movement, transactions can be recorded automatically.
Your inventory updates in the background.
Why This Matters for Excel Users
Excel is incredibly powerful. I use it every day.
But there is a tipping point where:
- Multiple users need access
- Permissions are required
- Mobile access becomes essential
- File version control becomes messy
That is where turning your spreadsheet into an app makes sense.
You are not replacing Excel. You are extending it.
When Your Spreadsheet Outgrows Excel
Here are common scenarios where this approach works well:
- Inventory management
- Internal CRMs
- Asset tracking
- Maintenance logs
- Workflow approvals
- Team dashboards
If your current process involves emailing spreadsheets around or consolidating updates from multiple users, an app built from your existing Excel structure can solve that.
How to Get Started
Start with one of your own files. Choose something structured with:
- Clean tables
- Unique IDs
- Clear relationships between sheets
Import it into Glide and replicate the logic using Relations and Rollups.
If you would like to try the exact demo shown here, download the file from the link above, and sign up for a free Glide account here. Note: I may earn a commission if you sign up for a paid plan, at no additional cost to you.
