When working in multiple Excel files we can waste a lot of time flitting back and forth between them.
In this tutorial you'll learn some game-changing tips that are guaranteed to streamline your workflow, making it easier than ever to navigate, arrange, and seamlessly work between multiple Excel files.
Watch the Video

Navigating Multiple Excel Files
Tip 1: Ctrl + Tab to switch between Excel windows (CTRL+SHIFT+Tab to scroll in reverse):

Bonus tip: this shortcut also works in PowerPoint and in Word it’s CTRL+SHIFT+F6.
Tip 2: Scroll through current Excel file sheets with Ctrl + PgUp/PgDn
Arranging Multiple Excel Files
Sometimes you need to see multiple files on the screen at the same time. We can use the arrange tools to help display them.
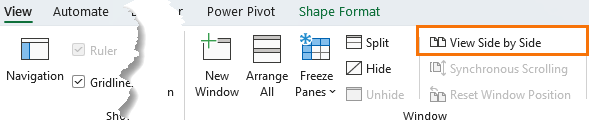
Tip 3: Arrange all Excel windows using the arrange button on the View tab of the ribbon > Arrange All:
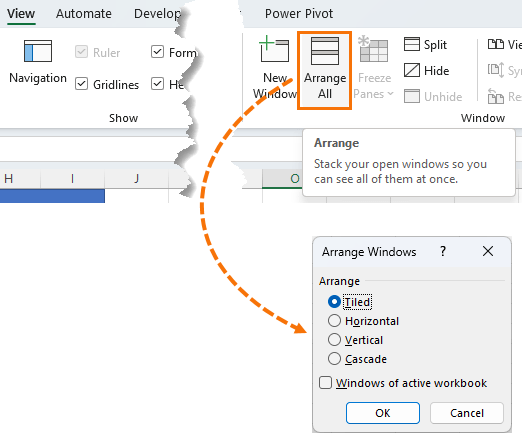
Enables you to display all Excel windows either tiled:
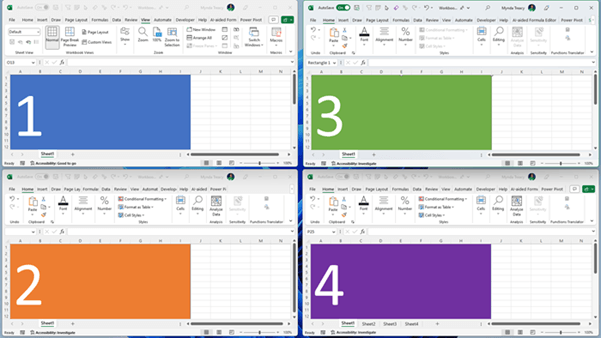
Horizontal, which isn’t much use with more than two files as you can’t see much of the spreadsheet even with the ribbon collapsed:
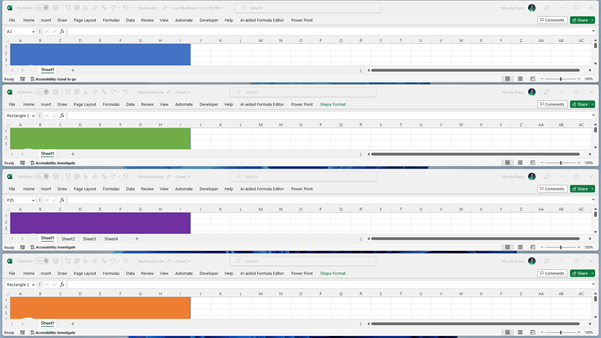
Vertical is better for comparing files side by side (also see the tip coming up on Synchronous scrolling for comparing files side by side):
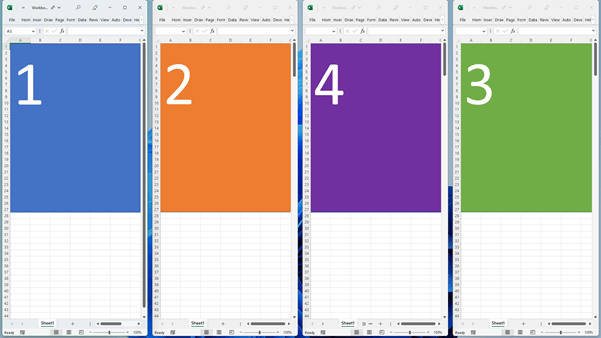
And lastly, cascading:

Of course, with all these arrangements you can manually left click and drag the outer edge of the windows to create a custom size. And left click and drag the top of the window to move it around.
Bonus tip: double click the top of the window to resize it to full screen.
Arranging Windows
Alternatively, you can arrange individual windows using shortcut keys. To snap to the left, press the Windows key + Left Arrow key (or right, up or down arrow keys to snap to other sides of the window):

You will then be asked which window you want snapped on the right:
More Keyboard Shortcuts
Check out our free eBook that lists 239 Excel Keyboard Shortcuts.
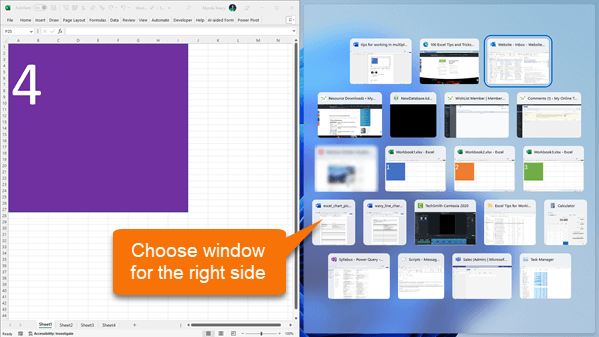
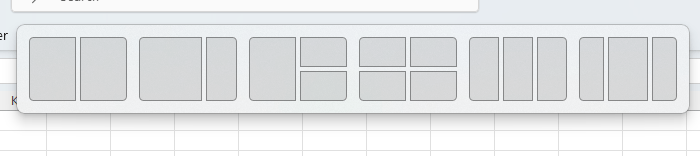
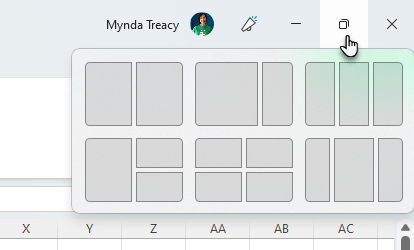
If you have Windows 11 you can drag the window to the top of your monitor, and you’ll be presented with 6 different arrangement options:
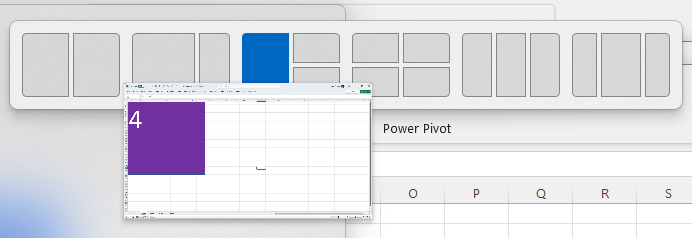
Simply left click and drag the window over the box you want it in and when the box turns blue, release the mouse:
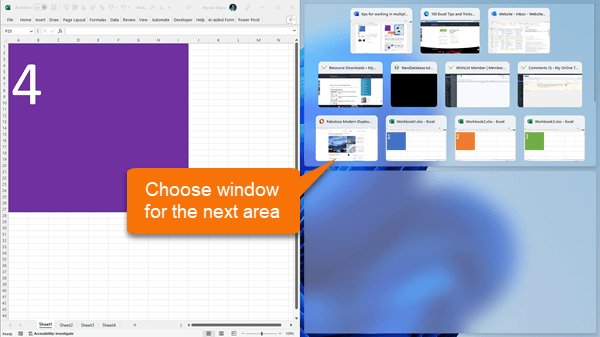
You’ll be presented with thumbnails for the remaining open windows, and you can select which one you want in the next area:
You can also access this menu from inside Excel by hovering over the maximise icon in the top left of any Office app (as well as some non-Office apps):
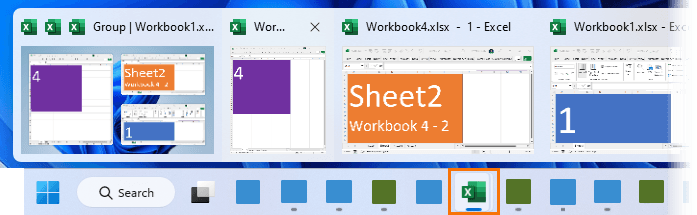
Window groups are remembered so you can easily navigate back to them via the task bar, as shown in the first option below where I have 3 workbooks in a group:
Viewing Multiple Sheets in the Same File
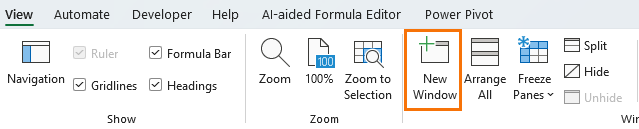
If you’re working in a file where you need to reference data on multiple sheets and you want to see them side by side, you can create a New Window via the View tab:
This opens another instance of the same file enabling you to see them side by side:
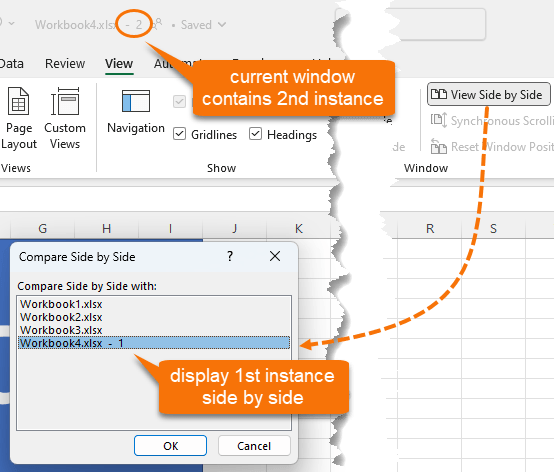
You can choose which workbook you want displayed beside the current workbook from the dialog box.
For example, in the image below you can see I’m currently in the second instance of the workbook as denoted by the “– 2” after the file name at the top of the screen.
In the ‘Compare Side by Side’ dialog box I can choose to display the first instance of the workbook side by side:
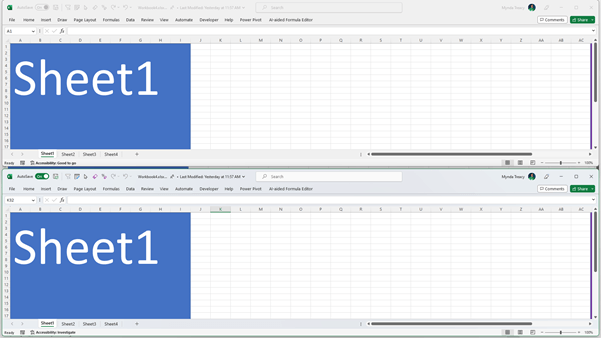
Rather than side by side, it actually arranges them tiled horizontally as you can see in the screenshot below:
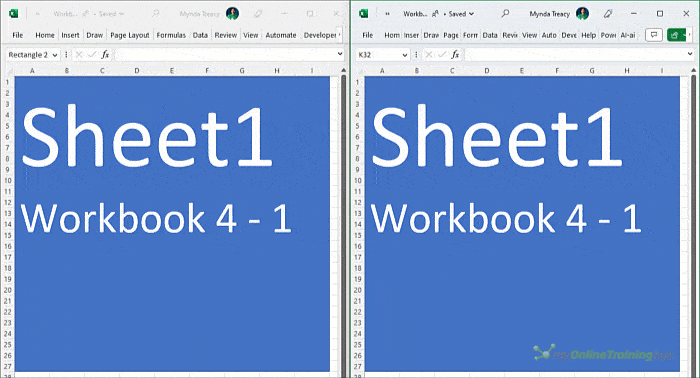
Excel doesn’t create a copy of the file as such, so anything you do in one instance of the workbook is instantly replicated in the other instance, so the views are always identical.
With this view, synchronous scrolling is automatically turned on so that any navigation performed in the active instance is performed in the other.
Synchronous scrolling works in whichever sheet you have selected, so you can view different sheets of the same workbook side by side:
Alternatively, you can turn off synchronous scrolling via the View tab:

You can also switch between the two instances of the same workbook using the keyboard shortcut CTRL+Tab which will toggle through all open Excel windows. Alternatively, you can go via the View tab > Switch Windows drop down:

When you’re done with the extra view of the workbook, simply close one of the instances. The other will remain open until you’re ready to close it too.
