Using Excel Styles in your workbooks can not only make formatting them quicker and easier, but also result in more professional and easier to use workbooks.
What are Excel Styles
Excel Styles are simply a group of formatting settings that can be applied in one fell swoop at the click of a single button. Those buttons are found on the Home tab of the ribbon (image below):

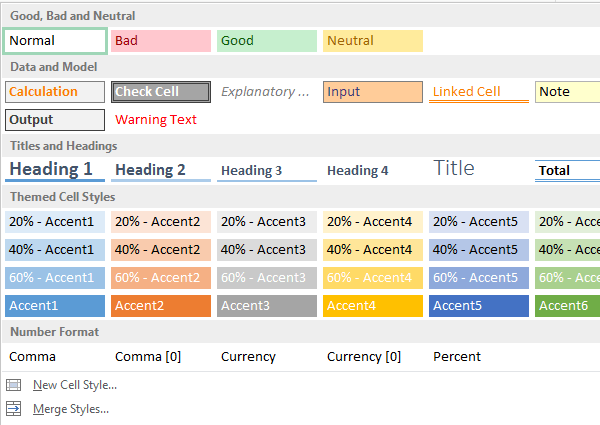
Clicking on the down arrow (circled in orange above) expands the Style gallery:

And you can see it’s broken down into 5 areas;
- Qualitative formats: Good, Bad and Neutral
- Data and Model coding
- Titles and Headings (similar to those you find in Microsoft Word)
- Themed Cell Styles
- Number Formats
Unfortunately you can’t rearrange the order of these areas.
There are also options to create a new style and merge styles together.
Working with Excel Styles
To apply a style to a cell, or group of cells simply select the cells and the go to the Style Gallery and click on the Style you want to apply.
You can add other formatting via the Format Cells dialog box (CTRL+1 to open) and these formats will be applied on top of the Style but they won’t modify the Style itself. Note: See ‘Gotcha’ number 1 below for consequences if you do this.
To remove a Style you can either Clear Formatting or choose the ‘Normal’ style from the gallery.
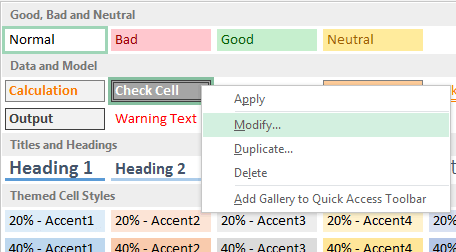
Right-clicking on a Style in the gallery reveals options to apply, modify, duplicate, delete and add the Style Gallery to the Quick Access Toolbar.

If you modify an existing Style those changes are automatically applied to all cells formatted with that Style, so it’s a very quick way to make formatting changes.
Creating your own Styles
Creating your own styles is particularly handy if you create Excel models or do a lot of reporting and want a consistent look and feel.
Hint: you might like to base the formatting on your company branding.
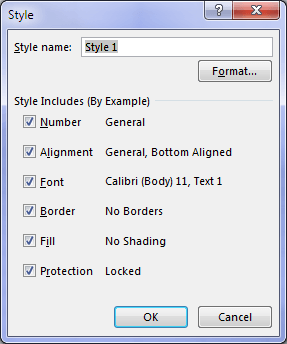
To create your own Style, click on the down arrow to expand the gallery; ‘New Cell Style’. This opens the following dialog box:

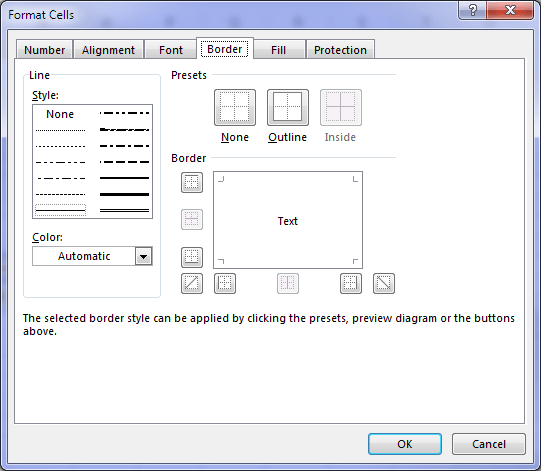
You can select the types of formatting this style will contain (by default they are all selected), and then click the ‘Format’ button to choose the formatting you want:

Tip: New Styles can be created from existing cells which contain the formatting you want. Simply select the cell before opening the New Cell Style dialog box. Alternatively, duplicating a style is another quick way to create a new style which uses much of the same formatting you want.
Style Gotchas
Excel Styles are awesome time savers but you have to be a little careful with them or they can cause you some headaches. Here are some common gotchas to watch out for:
- If you apply a Style to a cell and then make further formatting changes to that cell the Style is no longer connected to that cell. This means if you later modify the Style that cell will not pick up the changes.
You can fix this by applying the Style to the cell again.
- Styles are linked to the workbook Theme. If you change the Theme it will modify your Styles accordingly.
- If you create a Style, but don’t use it anywhere in your workbook it does not get saved with the workbook. A way to prevent this is to have a worksheet in your file which contains a legend for all of your Styles so they’re used at least once.
- Copying cells or sheets that contain Styles into new workbooks also copies the Styles. In Excel 2010 and earlier this can cause a MB blowout on your file size and result in hundreds of Styles being added to your Style Gallery. Better to always copy and paste as values. However if you do want to quickly remove all custom Styles from a workbook you can use this code created by fellow Excel MVP, Zack Barresse:
Option Explicit

Sub DELETESTYLES()
 '---------------------------------------------------
 '/// Created on: 4-Jan-2013
 '/// Created by: Zack Barresse
 '/// Purpose: Deletes all custom styles in workbook.
 '///
 '/// Modified by Catalin Bombea, 22-May-2017
 '/// Reason: Simplify code.
 '/// https://www.myonlinetraininghub.com/excel-styles
 '---------------------------------------------------

 If MsgBox("Delete all custom styles from " & ThisWorkbook.Name & "?", vbYesNo + vbDefaultButton2, "Delete custom styles?") <> vbYes Then Exit Sub

  Dim TempStyle As Style

   For Each TempStyle In ThisWorkbook.Styles

    If TempStyle.BuiltIn = False Then TempStyle.Locked = False: TempStyle.Delete

   Next TempStyle

End Sub
So, next time you create an Excel model or a new Dashboard report consider using Styles to help users navigate the workbook and give it a more polished look and feel.
More Style
More tips and VBA code for working with Styles is available here:

